
Using the Engagement Board
What the Board Is For
Section titled “What the Board Is For”When a member clicks a one-click response in an Engage email, that response is recorded and the member is placed on the Engagement Board — in a column that reflects what they said. A member who replied “I’m not sure I’ll renew” lands somewhere quite different from one who asked to volunteer.
The board turns a stream of individual replies into a worklist. Instead of reading responses one by one, your team opens the board and sees the shape of the work: how many people need contacting, how many are at risk, how many are waiting on follow-up.
Opening the Board
Section titled “Opening the Board”- Go to Datascout Engage and log in with the credentials provided by the Datascout team.
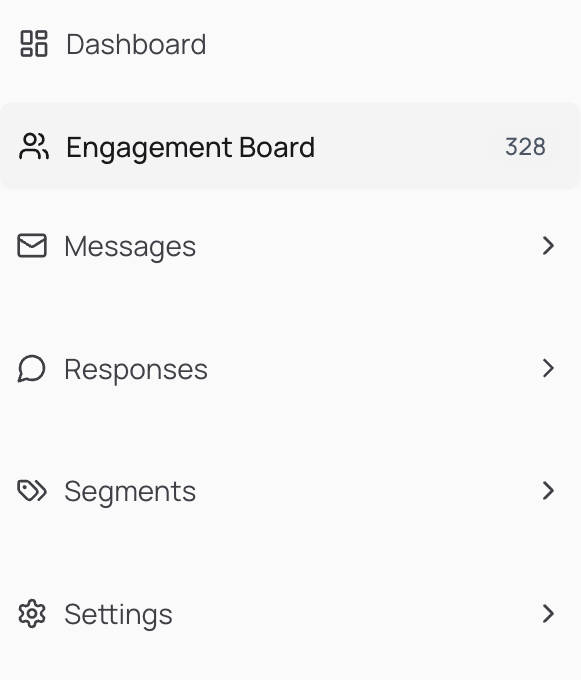
- Click Engagement Board in the left sidebar.
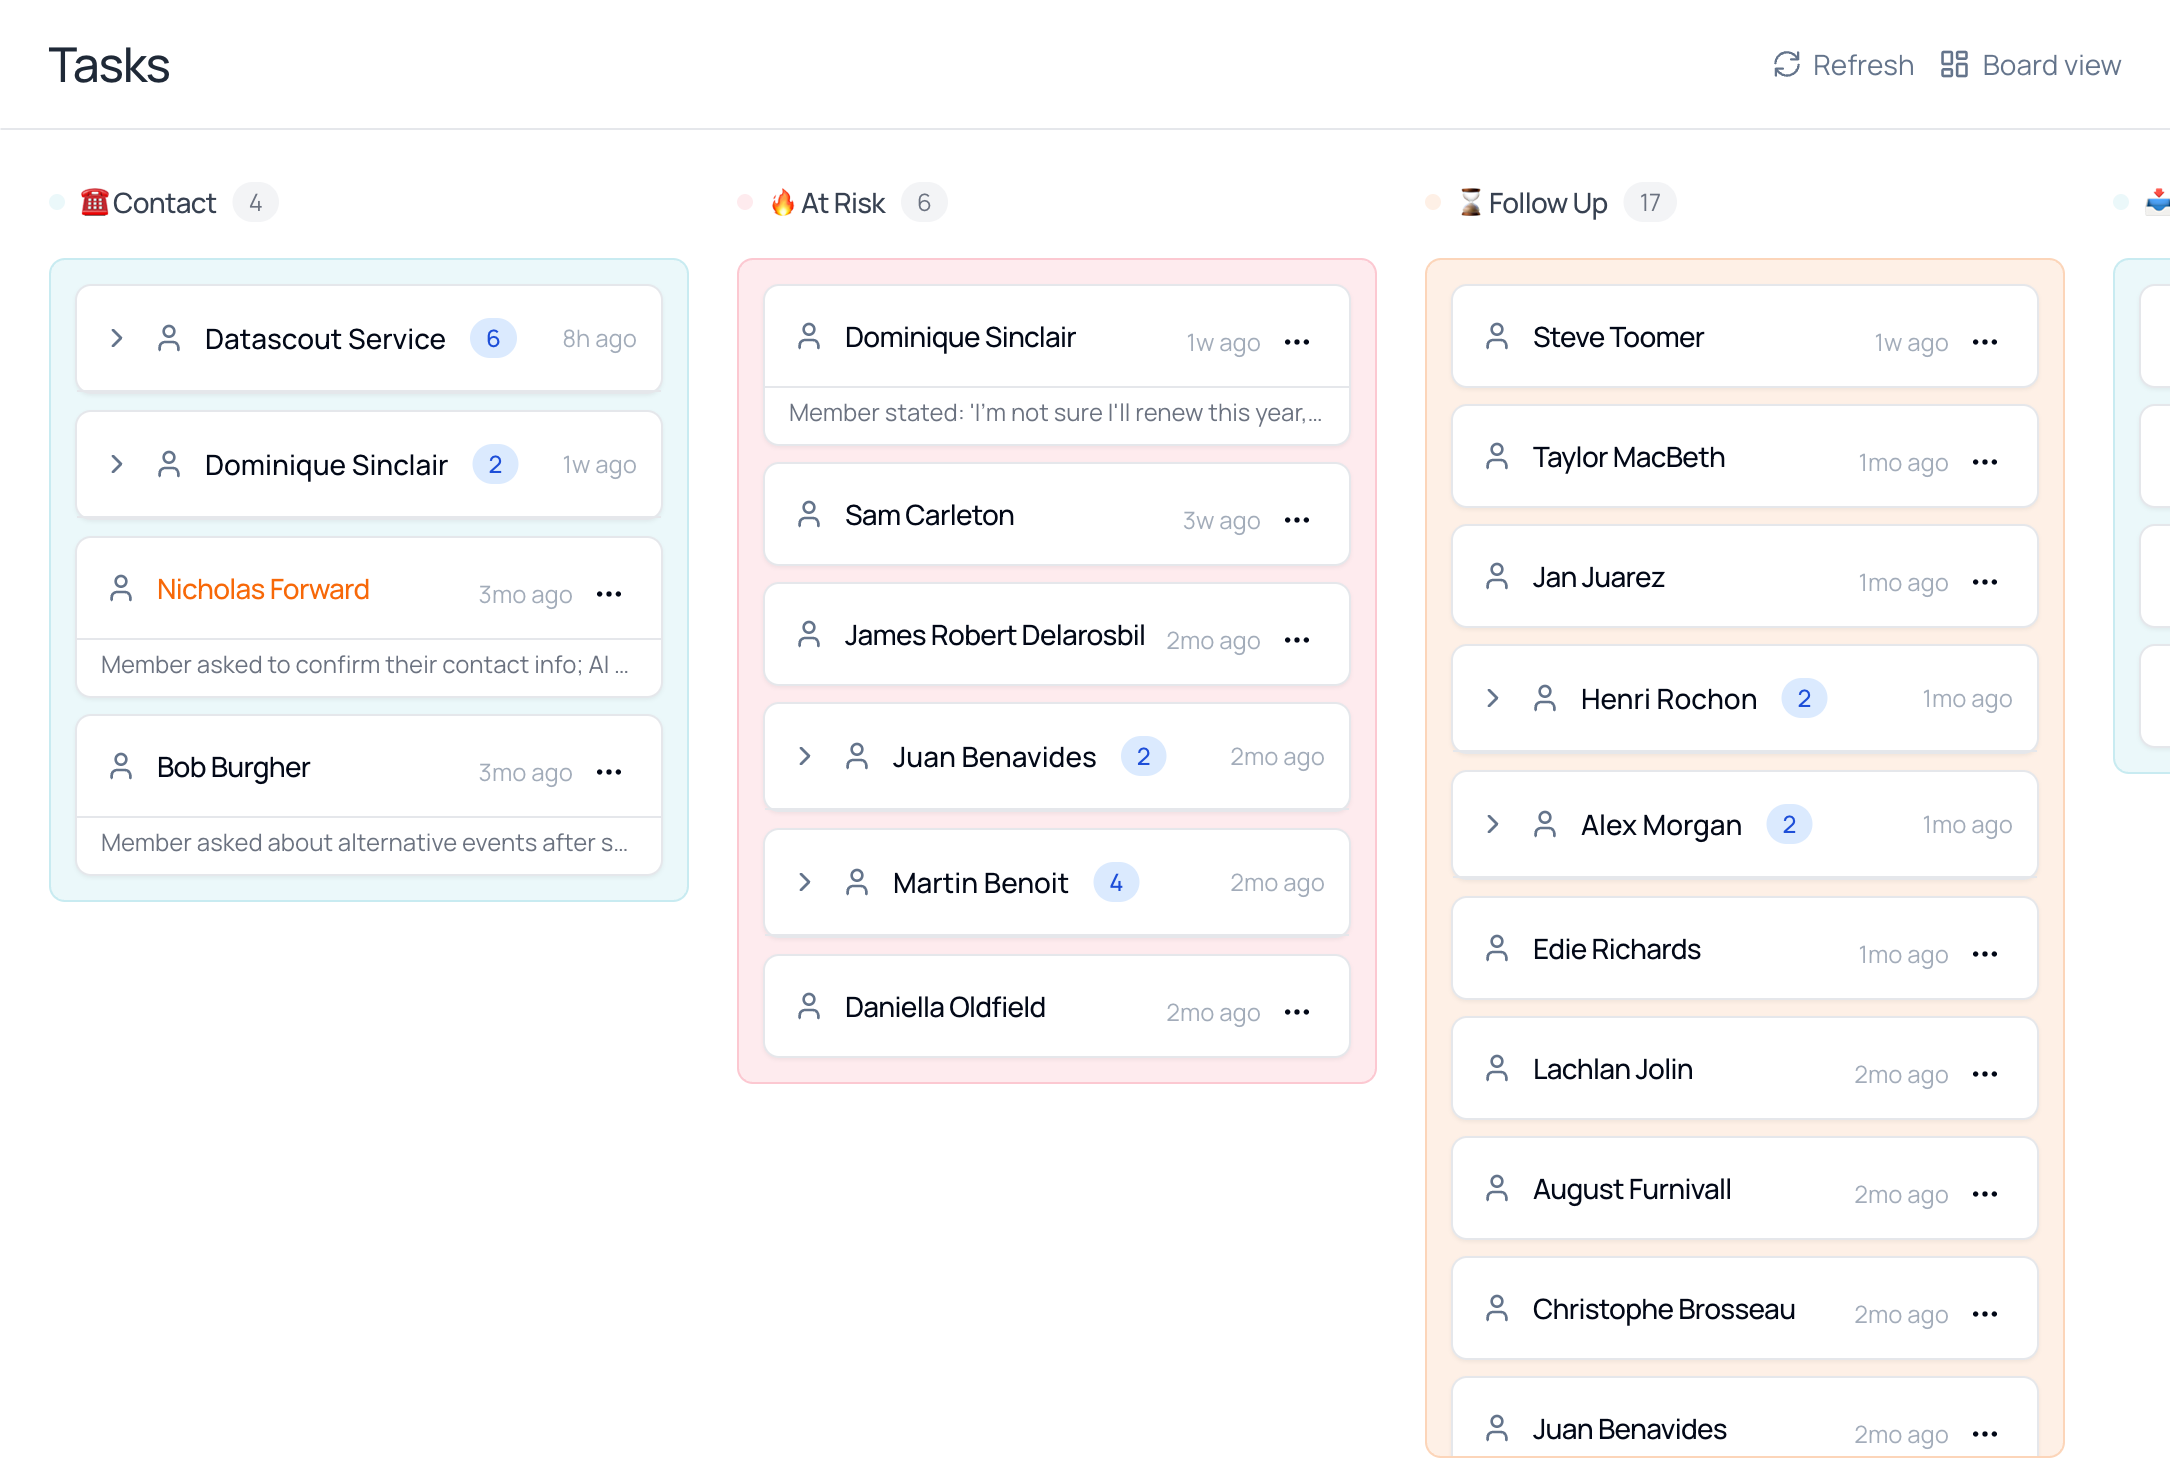
Two controls sit in the top-right corner:
| Control | What it does |
|---|---|
| Refresh | Reloads the board to pull in responses that have arrived since you opened it. |
| Board view | A label showing how the page is currently displayed. It is not a button. |
Columns and Cards
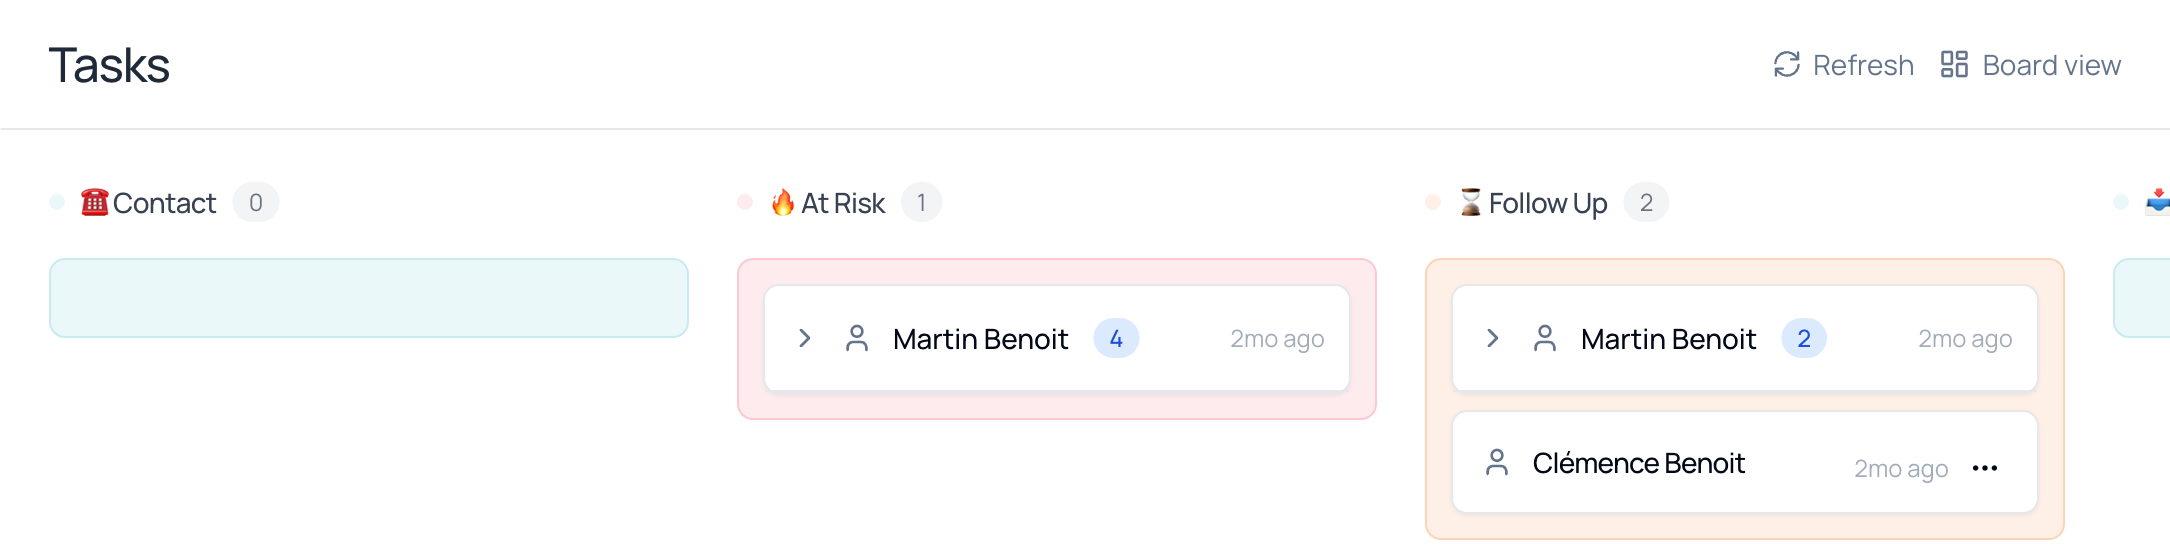
Section titled “Columns and Cards”Two numbers appear on the board, and they count different things.
- The column — a stage of work: Contact, At Risk, Follow Up. Its color and emoji are set by whoever created it.
- The column count — how many member cards sit in that column.
- The card badge — how many separate responses that one member has in the column.

A card in its resting state shows just the essentials — who, and how long ago:

Reading a Response
Section titled “Reading a Response”Click a card to open it. Everything you need to decide the next step is inside.
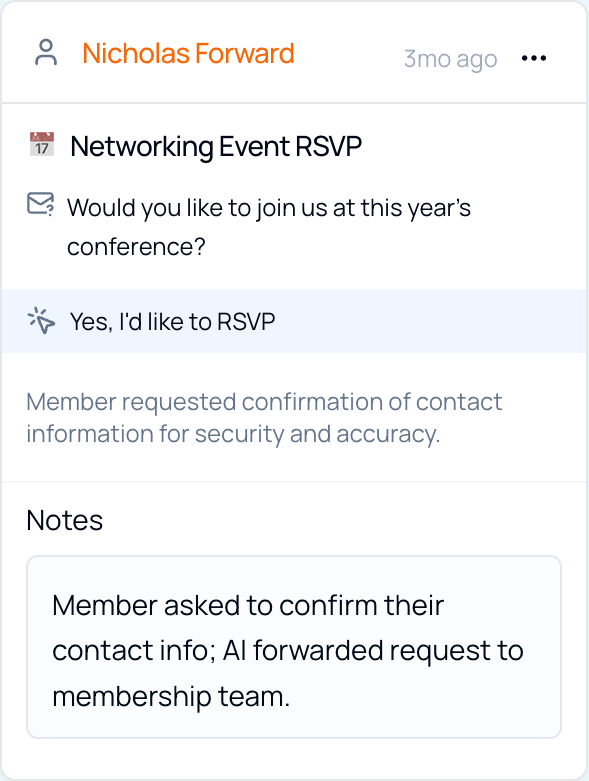
Reading top to bottom, an open card gives you four things:
| What you see | What it tells you |
|---|---|
| Campaign name | Which campaign or action produced this response — e.g. a Networking Event RSVP. |
| The question | Exactly what the member was asked in the email. |
| Their response | The one-click answer they chose, highlighted. |
| Summary | A short plain-language account of what the member wanted and what happened next. |
| Notes | Anything recorded from the member’s Concierge conversation, or added by your team. |
Members with Several Responses
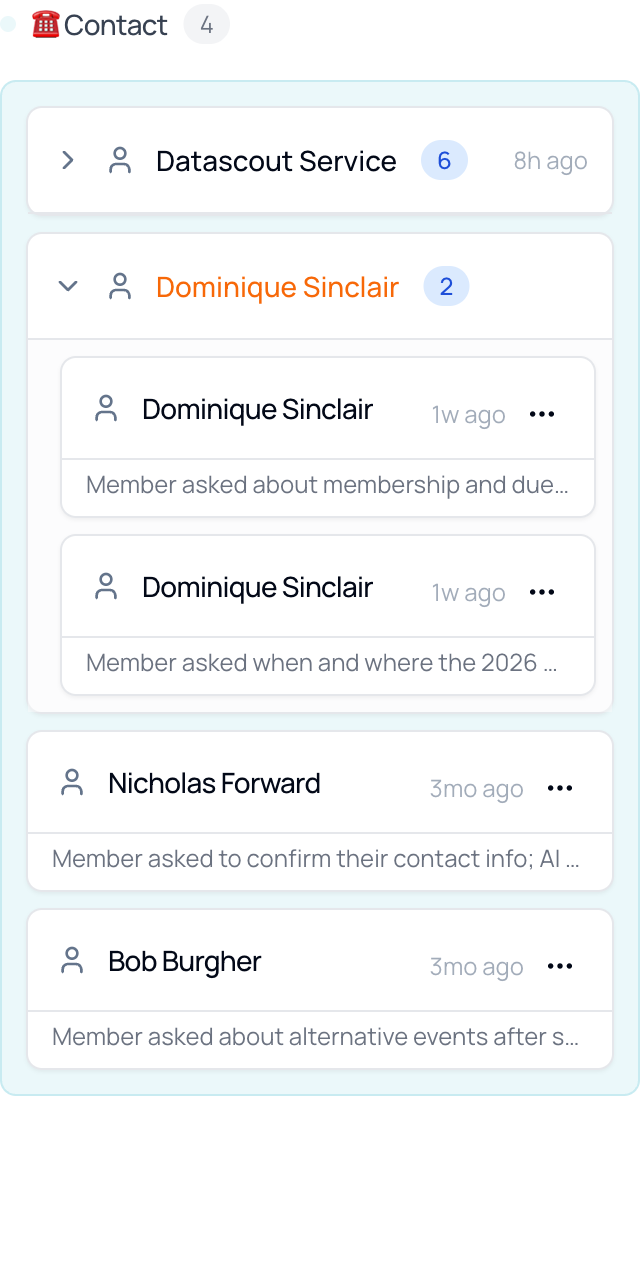
Section titled “Members with Several Responses”When one member responds more than once, their responses stack into a single card.
A card showing a chevron (›) and a number badge is holding more than one response. Click it to fan them out into separate entries, each with its own timestamp and summary. This keeps a frequently-active member from filling the column.
Finding a Member
Section titled “Finding a Member”The search box at the top filters the whole board at once.
Type any part of a member’s name into Filter tasks by member name… at the top of the screen. Every column narrows to matching cards, and the column counts update to reflect what is left — so you can see immediately which stages that member appears in.
Clear the box to bring the full board back.
Moving Members Between Columns
Section titled “Moving Members Between Columns”Drag a card to change where a member sits.
- Click and hold a member’s card.
- Drag it over the column you want and release. The card settles into place and both column counts update straight away.
You can also reorder the columns themselves the same way — drag a column by its header and drop it where you want it in the sequence.
Creating and Editing Columns
Section titled “Creating and Editing Columns”Columns are yours to shape — add stages that match how your team actually works.
Create a Column
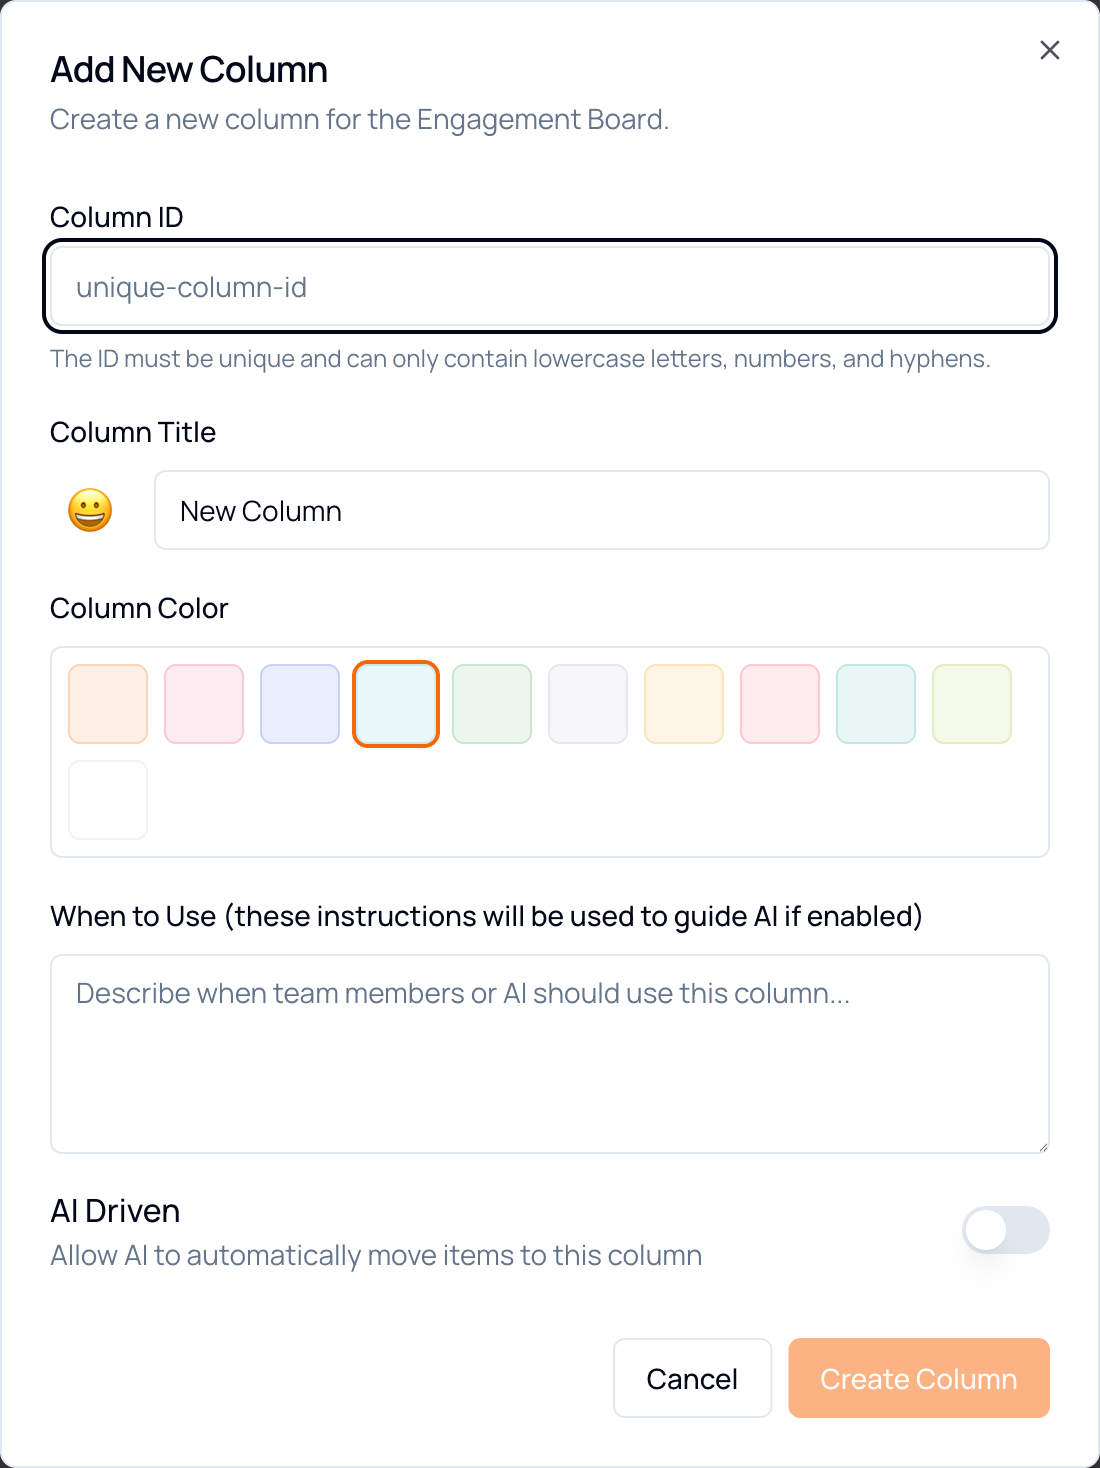
Section titled “Create a Column”- Scroll to the far right of the board and click Add Column.
- Fill in the form (see the table below). Create Column stays greyed out until you enter a Column ID.
- Click Create Column. It appears at the end of the board.
| Field | What to put in it |
|---|---|
| Column ID | A unique identifier. Lowercase letters, numbers and hyphens only — e.g. needs-callback. |
| Column Title | The name shown on the board, plus an emoji to make it recognizable at a glance. |
| Column Color | A background tint, for grouping related stages visually. |
| When to Use | A description of when a member belongs here. If AI Driven is on, this is the instruction the AI follows. |
| AI Driven | Allows Engage to move members into this column automatically, based on what they replied. |
Edit a Column
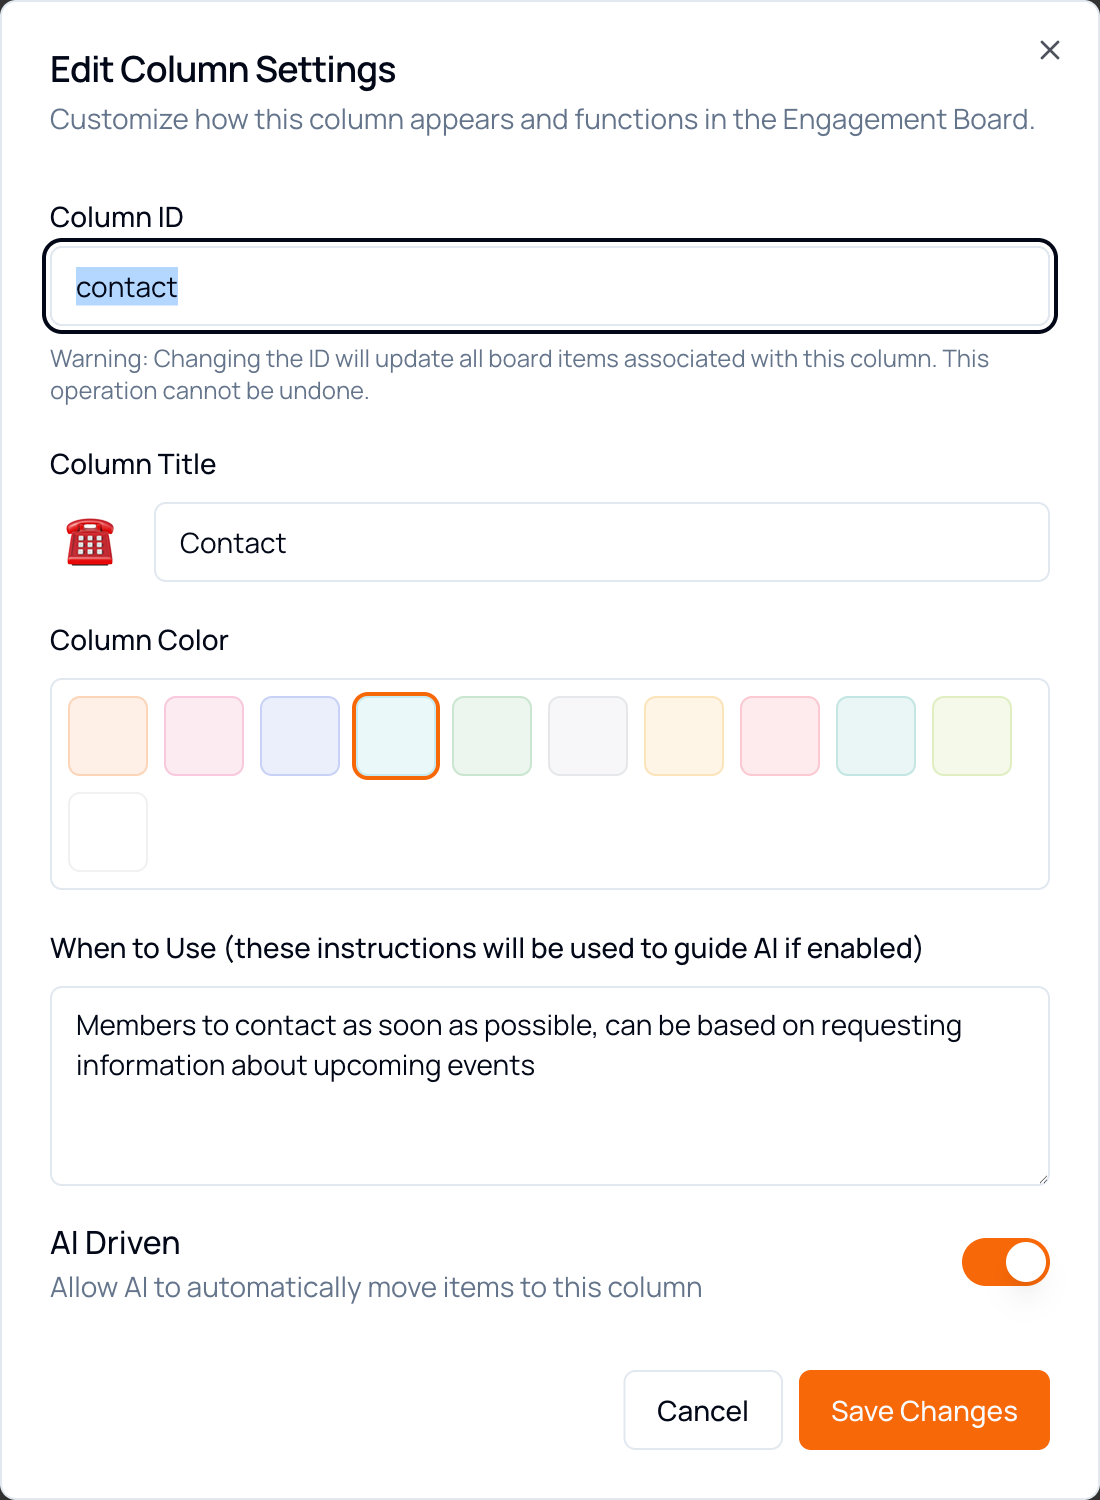
Section titled “Edit a Column”- Hover over the column header — a gear icon appears at its right-hand end.
- Click the gear to open Edit Column Settings.
- Change what you need, then click Save Changes.
Where Members Come From
Section titled “Where Members Come From”Cards arrive on the board in two ways.
| Route | How it works |
|---|---|
| Campaign routing | Each one-click response in a campaign action can be pointed at a specific column. A member who clicks “Still thinking it over” lands in your follow-up stage automatically. |
| AI placement | On columns with AI Driven switched on, Engage reads the member’s reply and places them using the column’s “When to Use” instructions. |
Campaign routing is configured on the campaign itself, on the Campaigns screen, against the relevant action. Set the destination column against each response, save, and new responses will begin arriving in the right place.
Troubleshooting
Section titled “Troubleshooting”| Symptom | Cause & fix |
|---|---|
| A response you expected isn’t on the board | Click Refresh — the board does not update by itself while open. If it still isn’t there, check that the campaign response has a destination column set. |
| A member is in the wrong column | Drag them where they belong. If it keeps happening for the same kind of reply, the campaign’s routing or the column’s “When to Use” instructions need adjusting. |
| Members aren’t being placed automatically | Open the column’s settings and confirm AI Driven is on and the “When to Use” description actually describes the behavior you want matched. |
| A column shows fewer cards than expected | Check the filter box at the top of the screen is empty — an active filter narrows every column. |
| You can’t find a member | Search filters on name only. If they responded to a campaign routing elsewhere, they may be in a column further along — scroll sideways to see the full board. |
| A move didn’t stick | Refresh and check again. Moves apply immediately, so if the card returns, someone else may have moved it — the board is shared across your organization. |