
Creating a Segment
What a Segment Is
Section titled “What a Segment Is”Every member record in Engage carries tags — short labels such as past-due, loc-canada, regular-member, or role-teacher. Tags are drawn from your iMIS data and describe membership status, location, tenure, interests, event history, and more.
A segment is a saved rule about those tags — for example “members who are past due, in the US or Canada, and not non-members.” Because Engage saves the rule rather than a fixed list of names, you can return to a segment later and it will reflect your current membership data.
Opening the Segment Builder
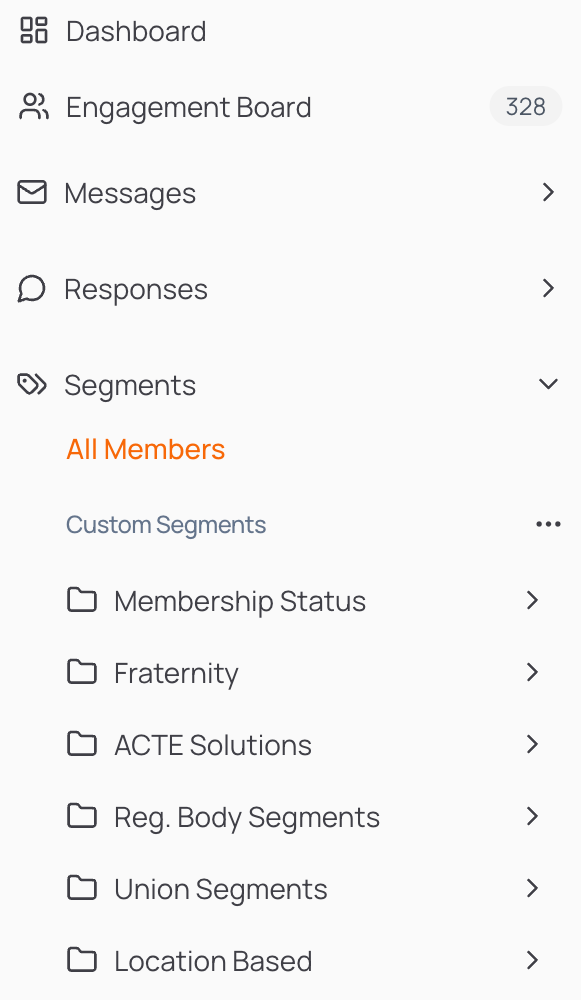
Section titled “Opening the Segment Builder”Everything starts from Segments → All Members.
- Go to Datascout Engage and log in with the credentials provided by the Datascout team.
- In the left sidebar, click Segments to expand it.
- Click All Members. This opens the Segment Builder with your full member list loaded and no filters applied.
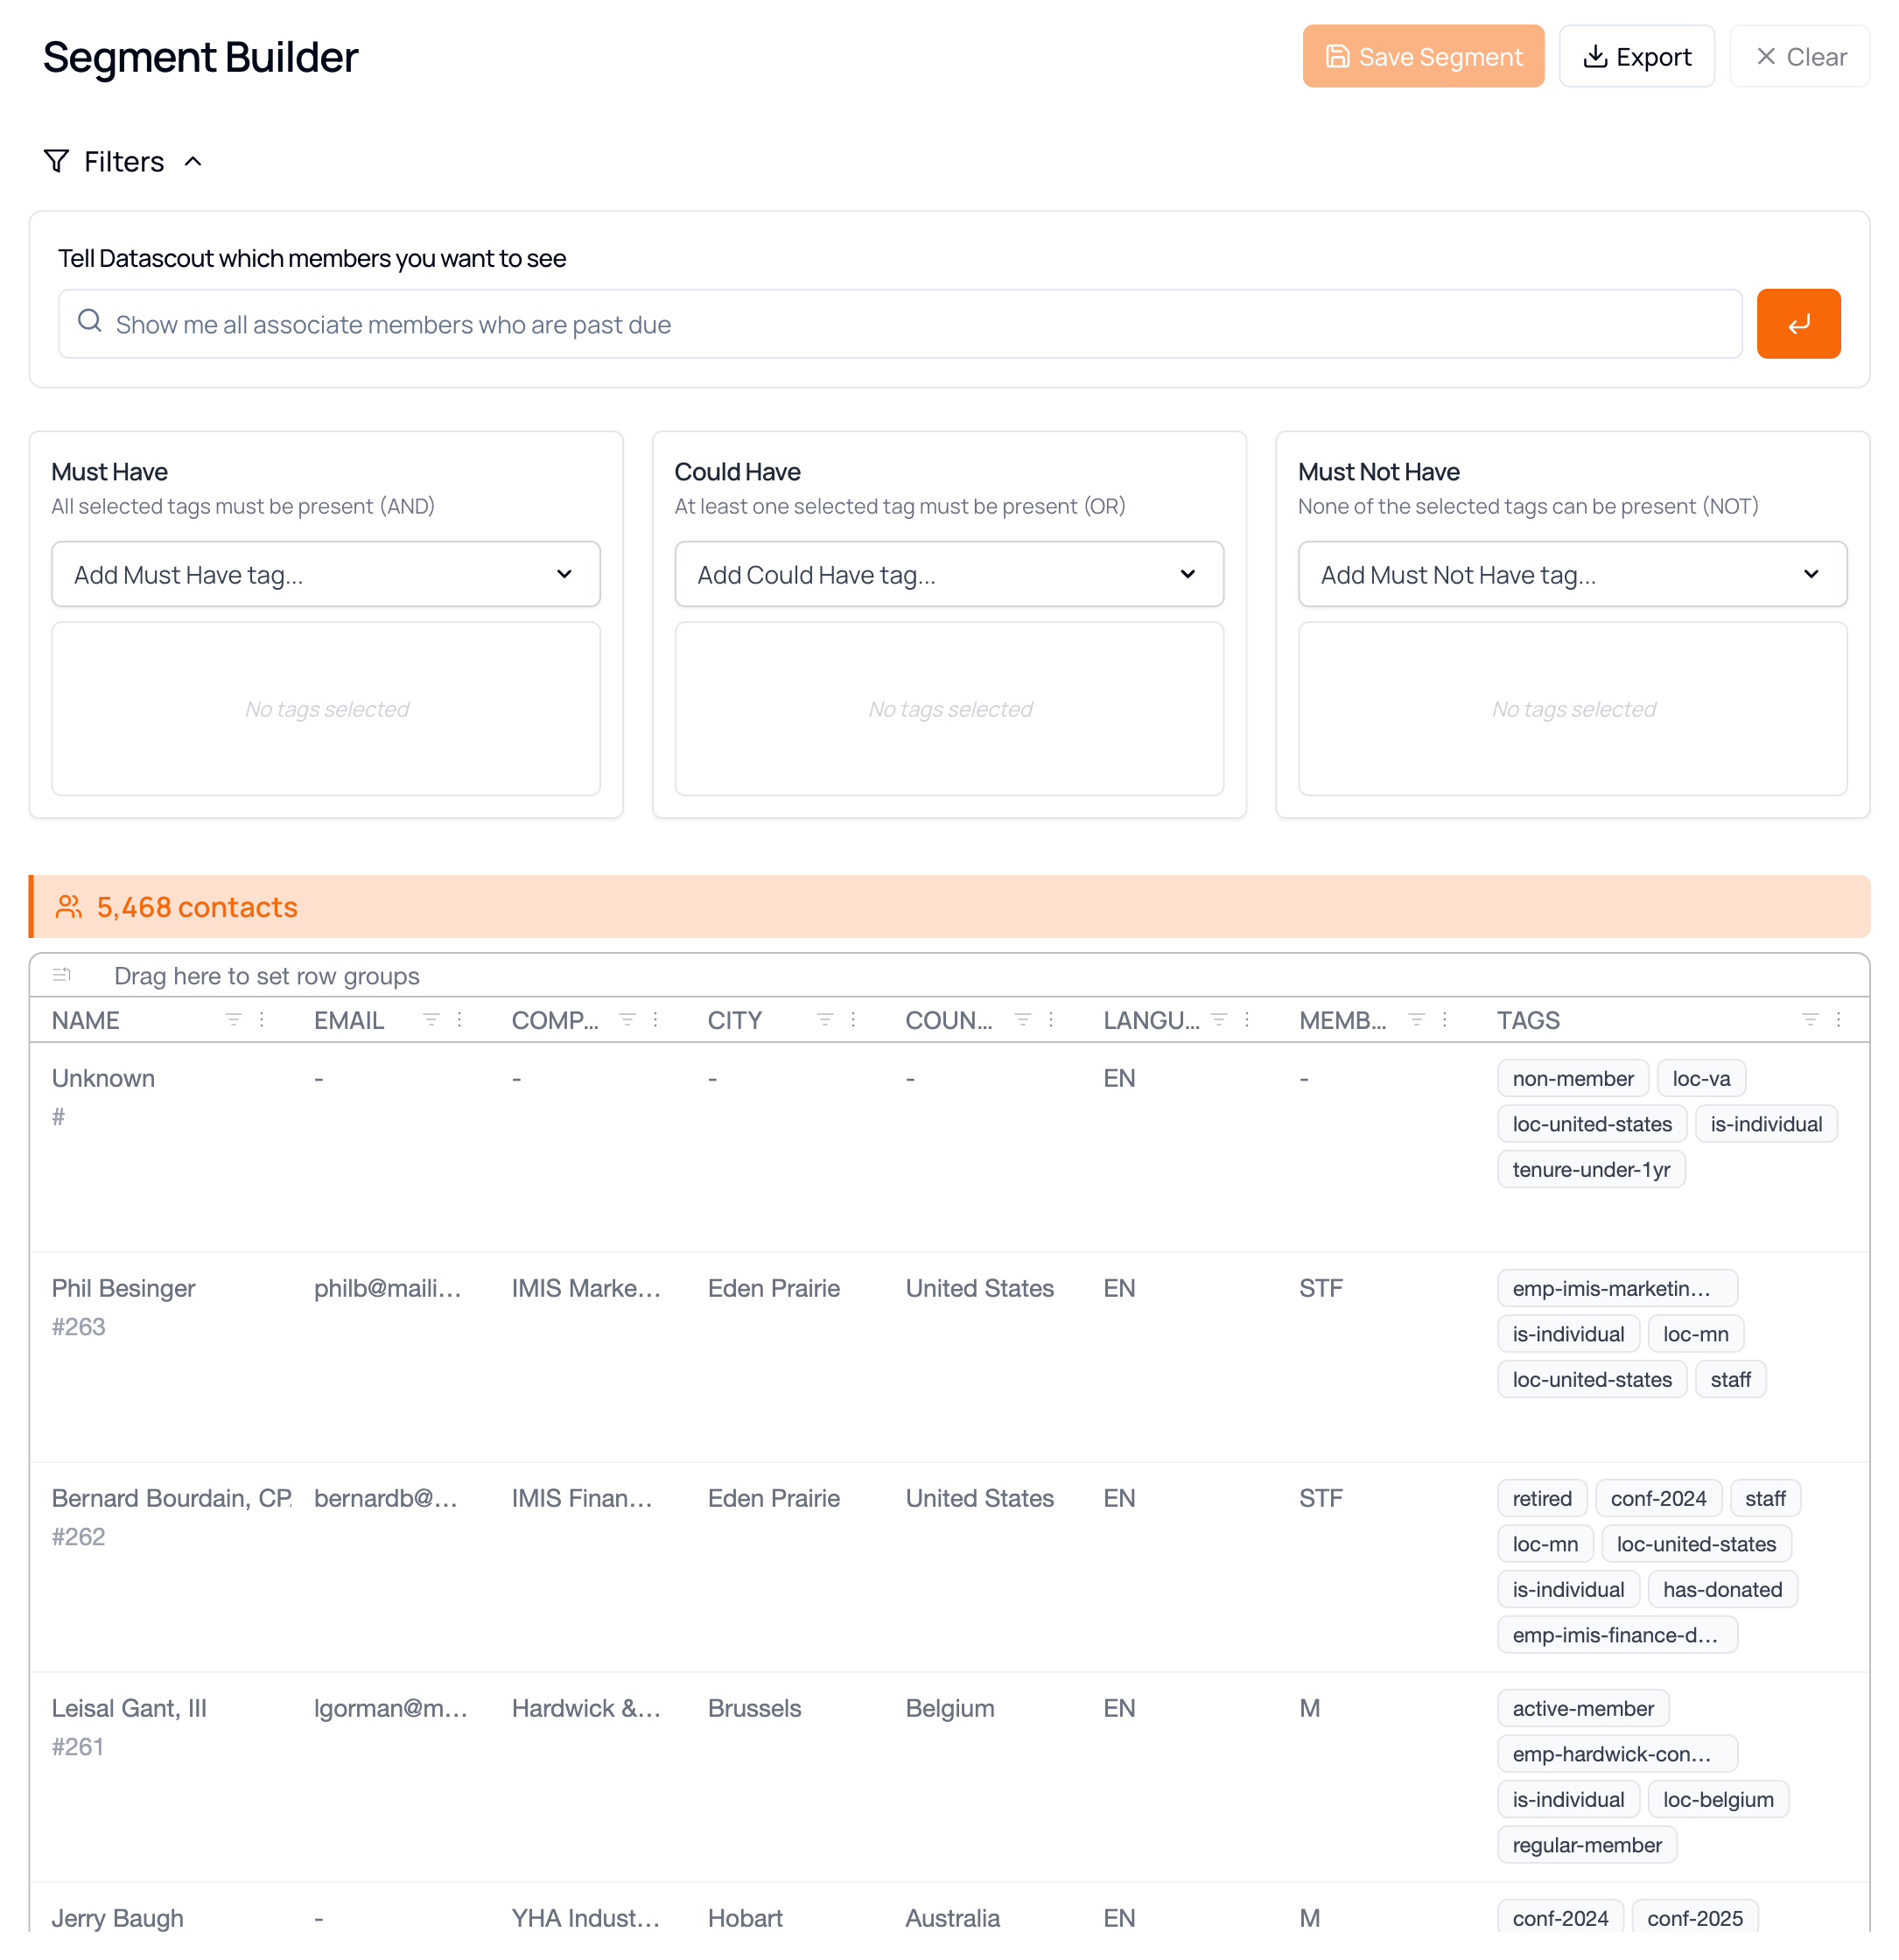
The builder has four parts, top to bottom:
| Area | What it does |
|---|---|
| Toolbar | Save Segment, Export and Clear, top right. |
| Ask box | Describe the members you want in plain English. |
| Filter boxes | The three tag rules — Must Have, Could Have, Must Not Have. |
| Results | A live contact count, then the matching members in a grid. |
The Three Filters
Section titled “The Three Filters”Master these and you can build any segment.
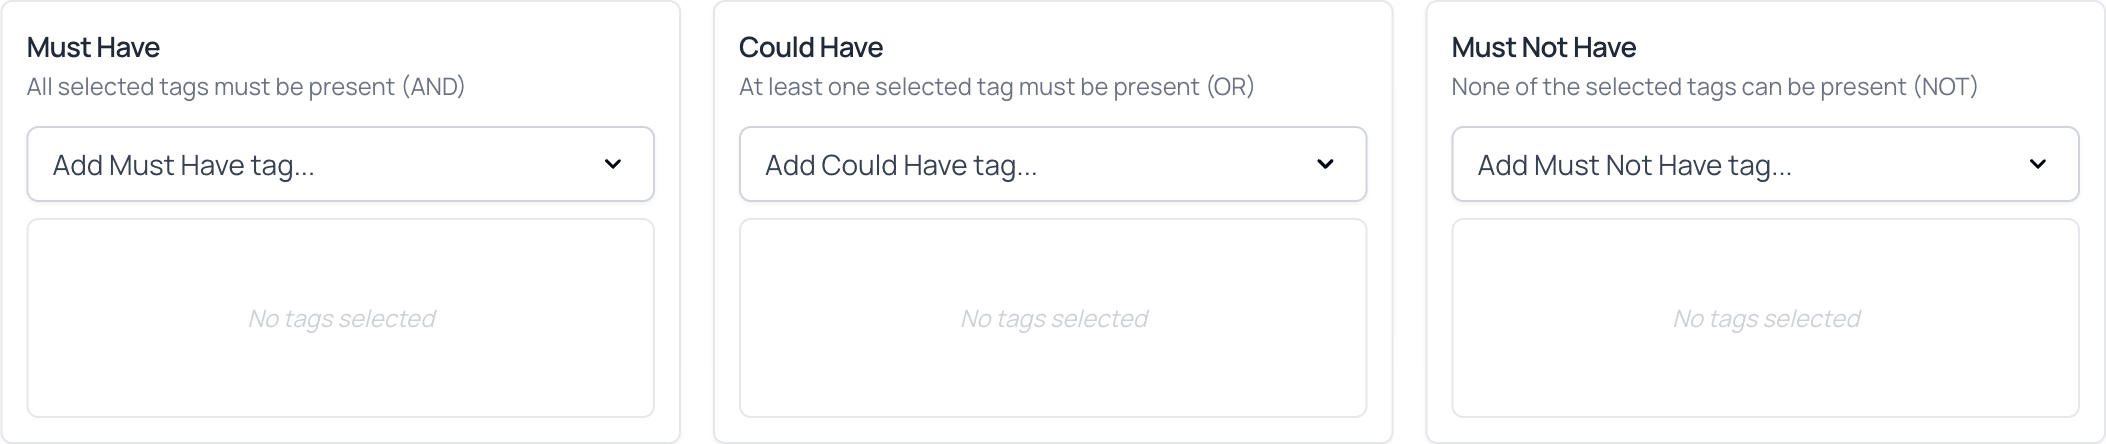
- Must Have (AND) — the member must carry every tag in this box.
- Could Have (OR) — the member must carry at least one tag in this box.
- Must Not Have (NOT) — the member must carry none of the tags in this box.
The three boxes are then combined with AND: a member is included only if they satisfy the Must Have rule and the Could Have rule and the Must Not Have rule. Any box you leave empty is simply ignored.
A Worked Example
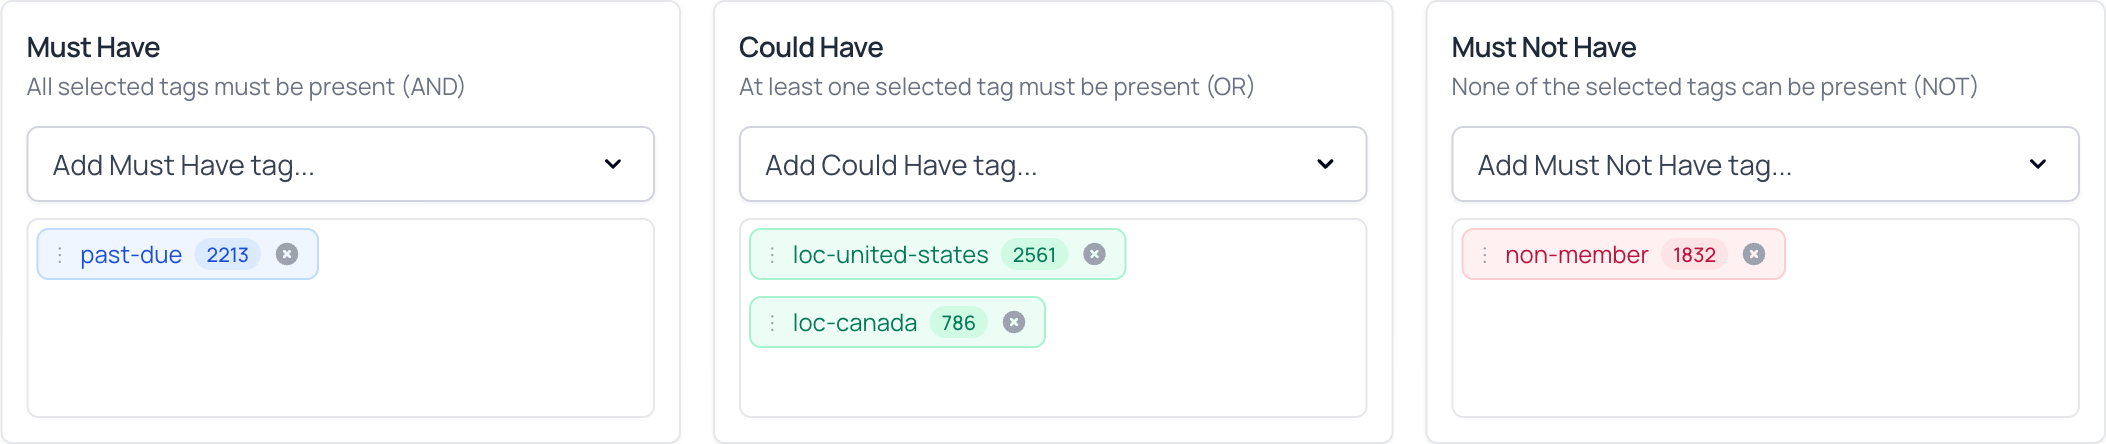
Section titled “A Worked Example”Say you want past-due members located in the United States or Canada, excluding non-members. That maps onto the three boxes like this:
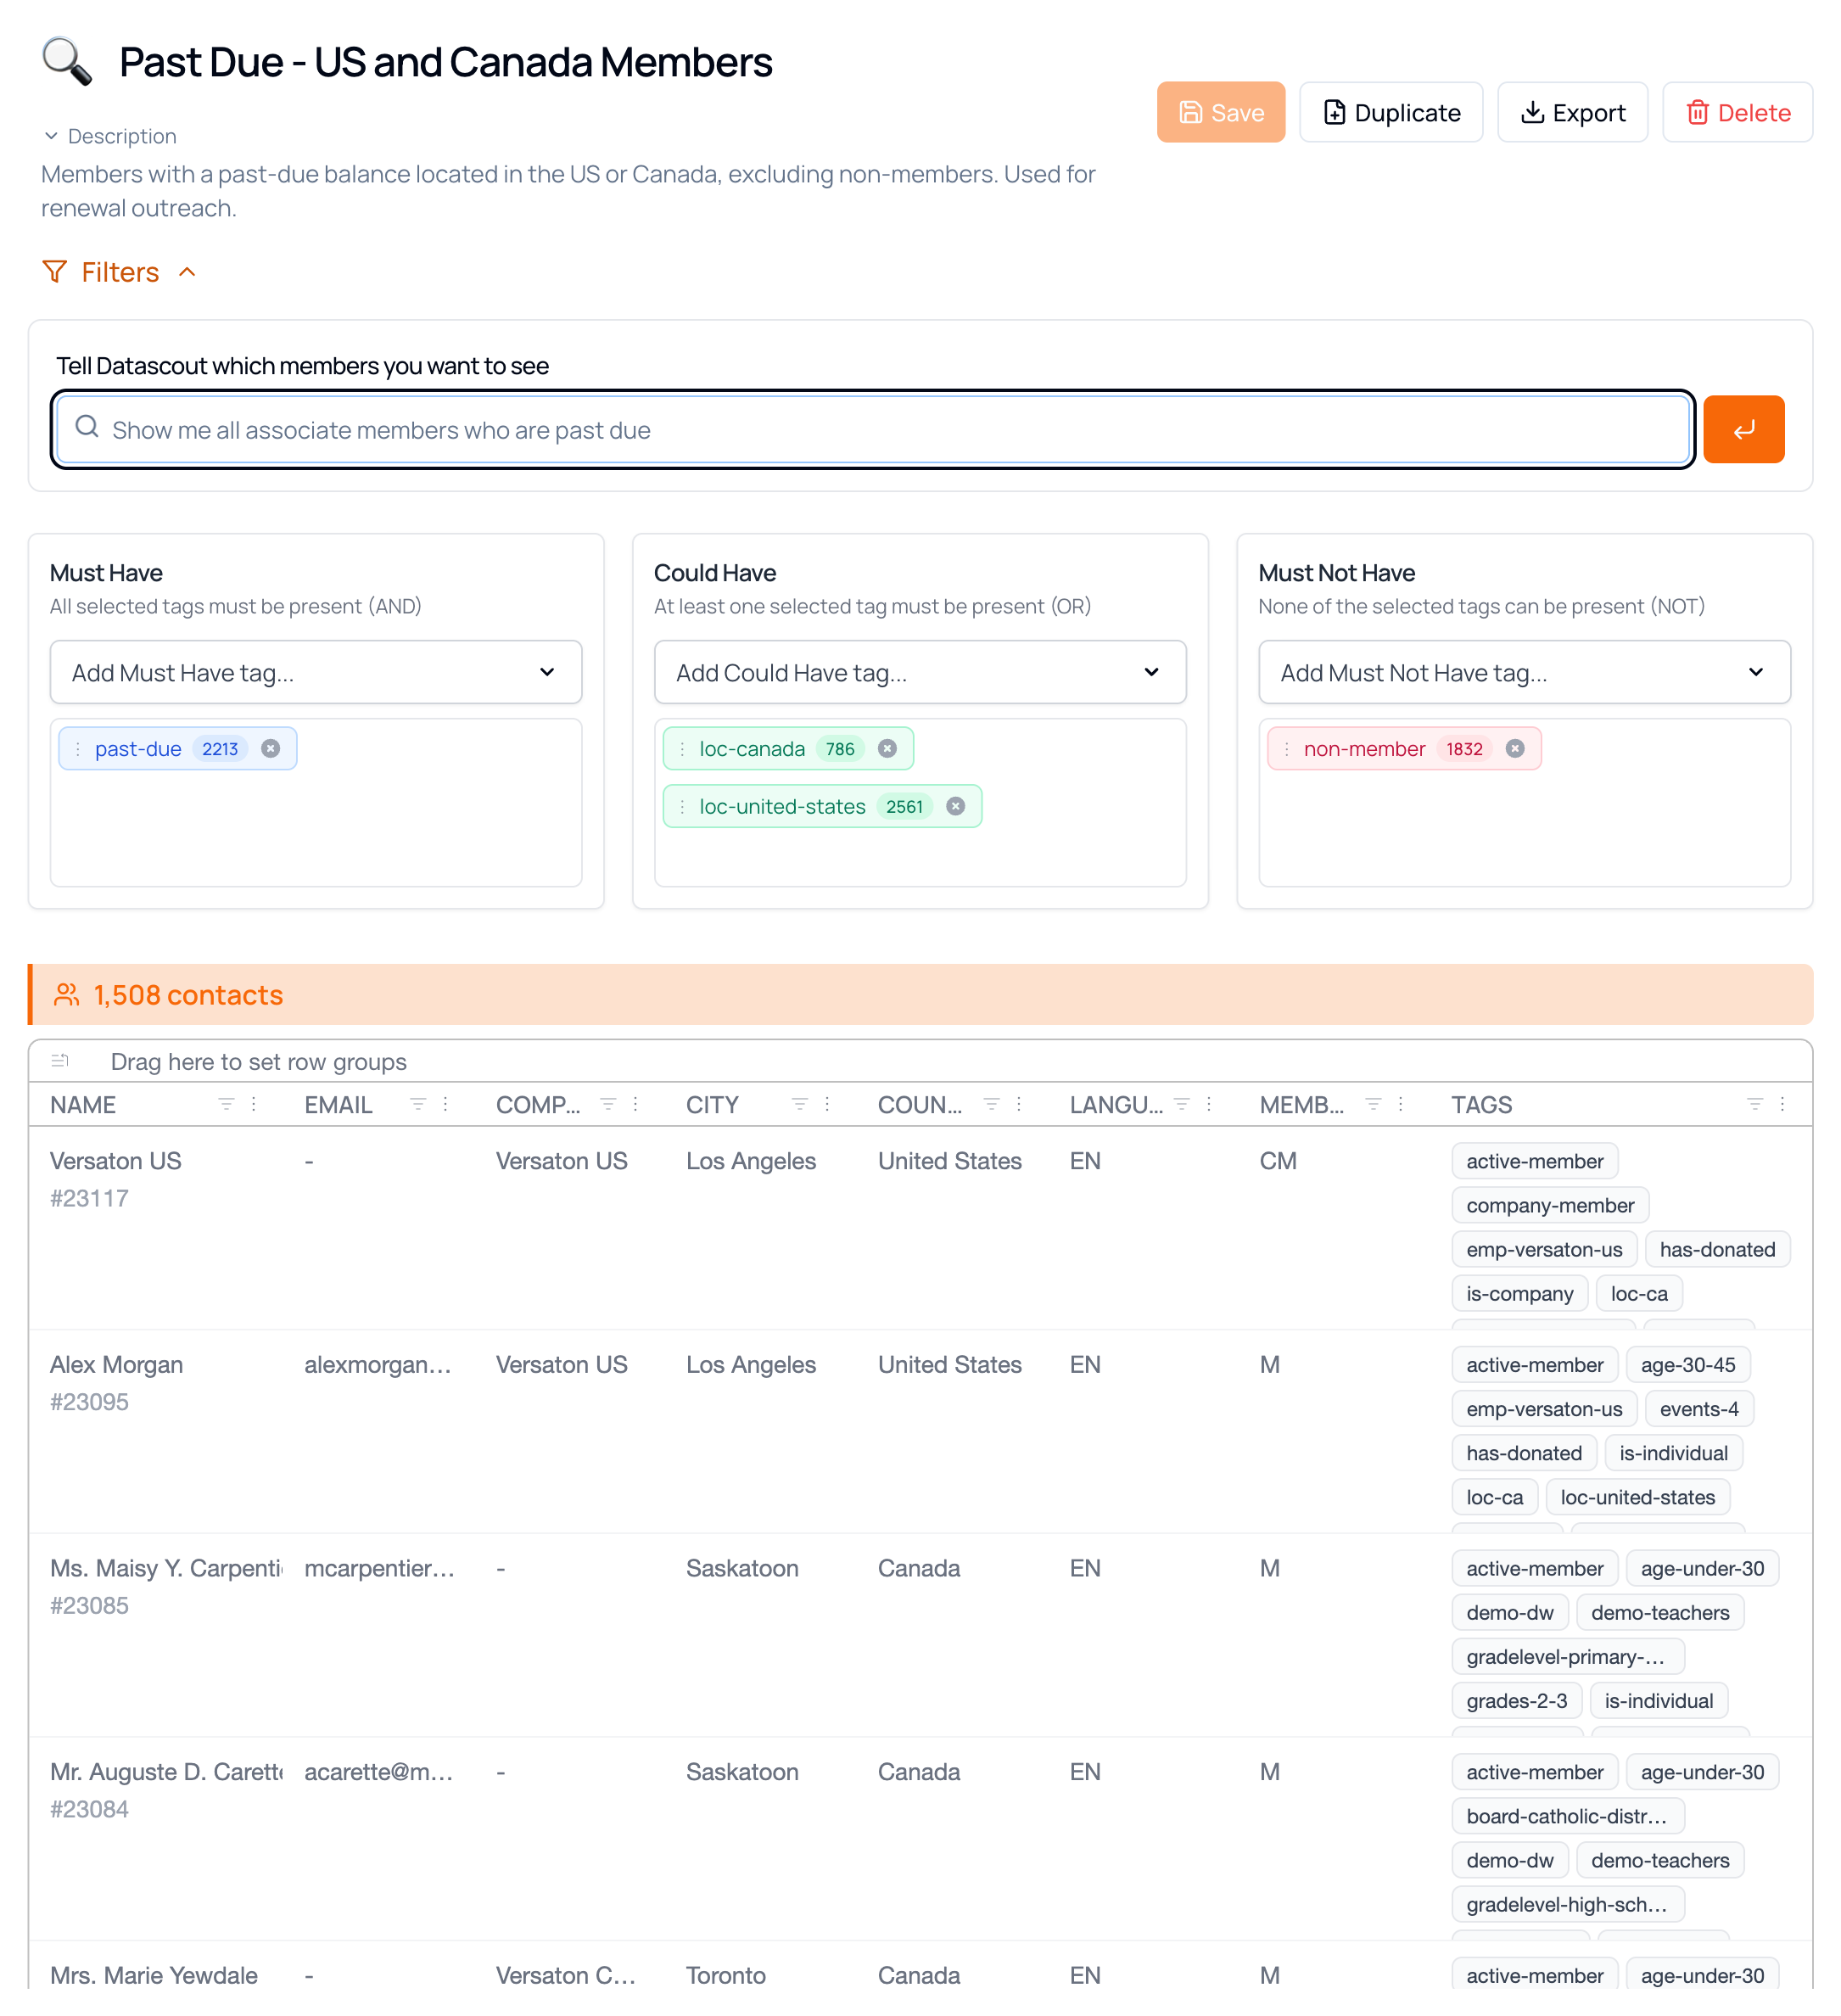
Past due · US or Canada · members only
| Box | Tags |
|---|---|
| Must Have | past-due |
| Could Have | loc-united-states, loc-canada |
| Must Not Have | non-member |
In this example account, that narrows 5,468 contacts → 2,213 with past-due alone → 1,508 once the location and exclusion rules are applied.
Read it as a sentence: must be past due, and must be in the US or Canada, and must not be a non-member. Putting the two location tags in Could Have is what makes them an “either/or” — placing them in Must Have instead would demand members be tagged with both countries at once, which almost nobody is.
Building a Segment
Section titled “Building a Segment”Three ways to fill the boxes. They produce identical results, and you can mix them freely.
Method 1 — Ask in Plain English
Section titled “Method 1 — Ask in Plain English”The quickest route. Describe the members you want in the Tell Datascout which members you want to see box at the top of the builder, then click the orange arrow or press Enter. Datascout reads your sentence and fills the three filter boxes for you.

After a moment, the tags appear in the boxes, sorted into the right rule:
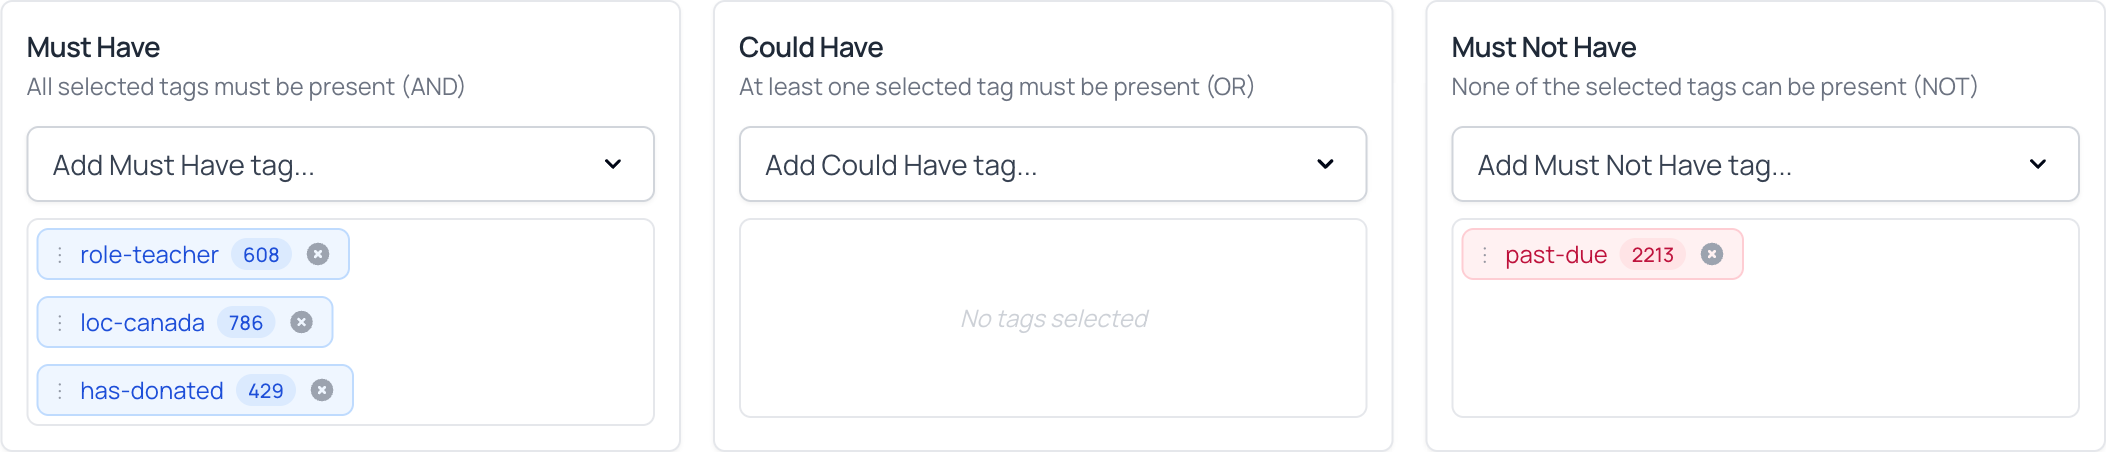
Datascout maps ordinary words onto the three rules the way you would expect:
| When you write… | It goes to | Example |
|---|---|---|
| “and”, or simply listing traits | Must Have | “teachers in Canada who have donated” |
| “or”, “either”, “any of” | Could Have | “in the United States or Canada” |
| “not”, “excluding”, “but not” | Must Not Have | “but are not past due” |
Method 2 — Pick Tags from the List
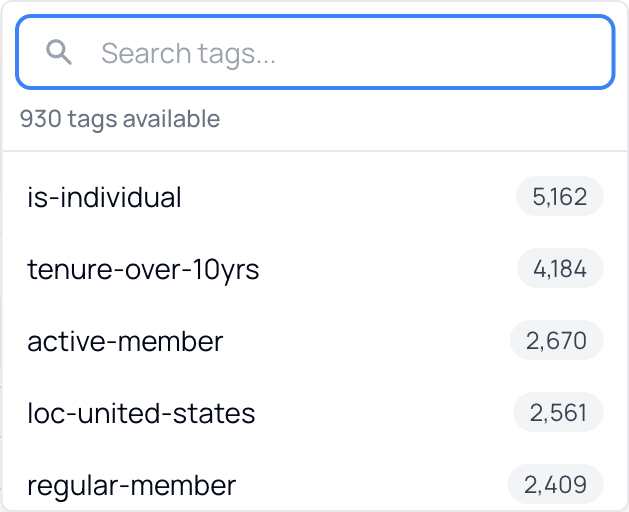
Section titled “Method 2 — Pick Tags from the List”- Click Add Must Have tag… (or Add Could Have tag… / Add Must Not Have tag…) on the box you want to fill.
- The tag list opens, sorted by size — the most-used tags first, each with its member count.
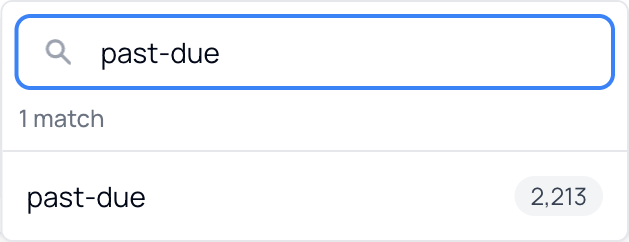
- Type into Search tags… to narrow the list. The counter updates to show how many tags match.
- Click a tag to apply it. The list stays open so you can add several in a row; click elsewhere or press Esc to close it.
Method 3 — Drag a Tag from the Results
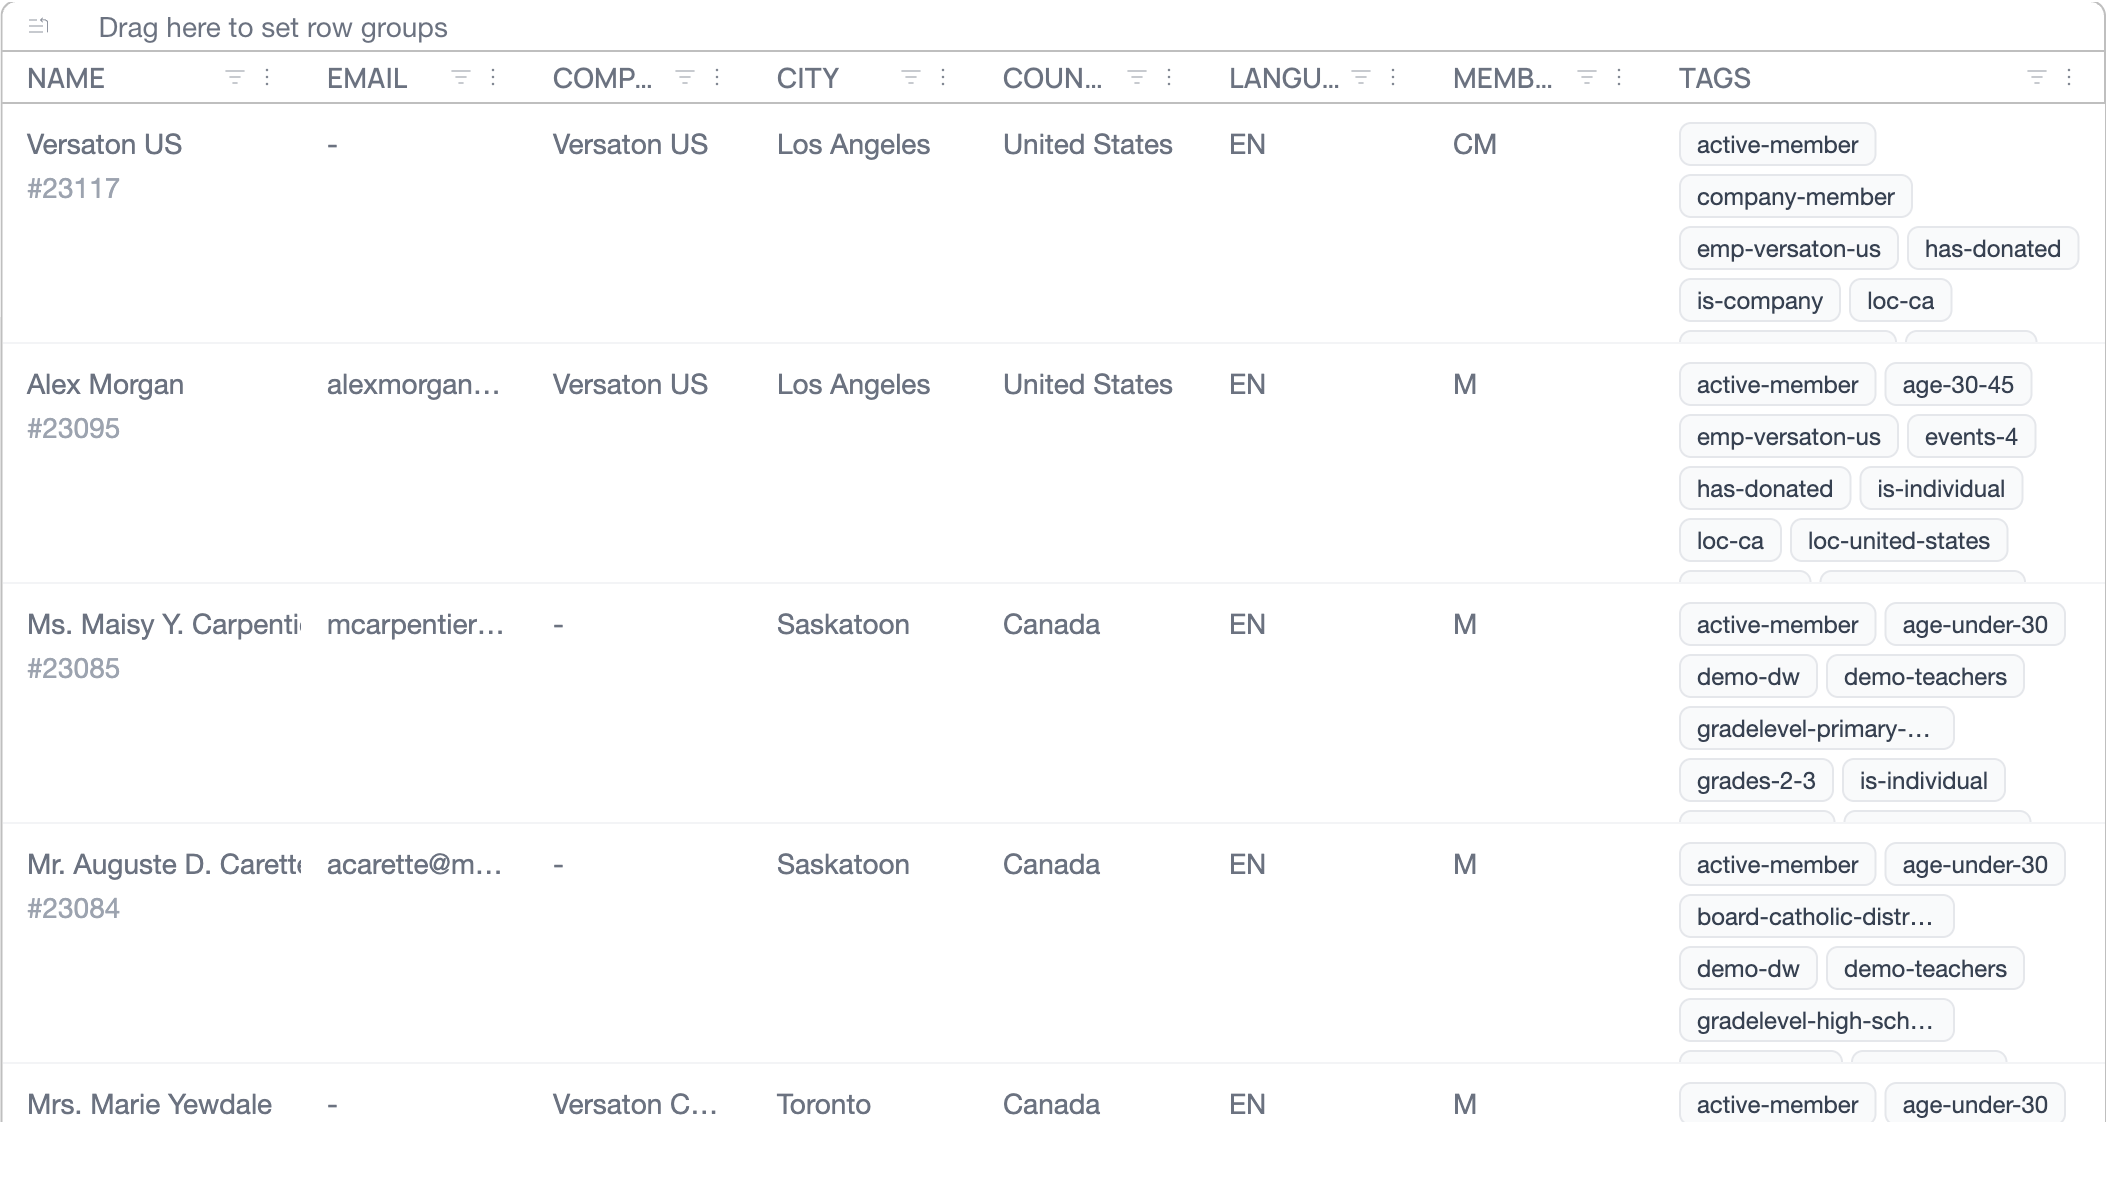
Section titled “Method 3 — Drag a Tag from the Results”Every tag chip in the Tags column of the member grid can be dragged straight into a filter box. This is the quickest way to build a segment when you have spotted a useful tag on a member you are already looking at.
- Find a tag you want in the Tags column of the results grid.
- Drag it onto any of the three filter boxes and release.
- To move a tag between boxes afterwards, drag its chip from one box to another — for example from Must Have to Could Have to loosen the rule.
Reading Your Results
Section titled “Reading Your Results”The count updates the moment a filter changes — use it to check your logic before saving.
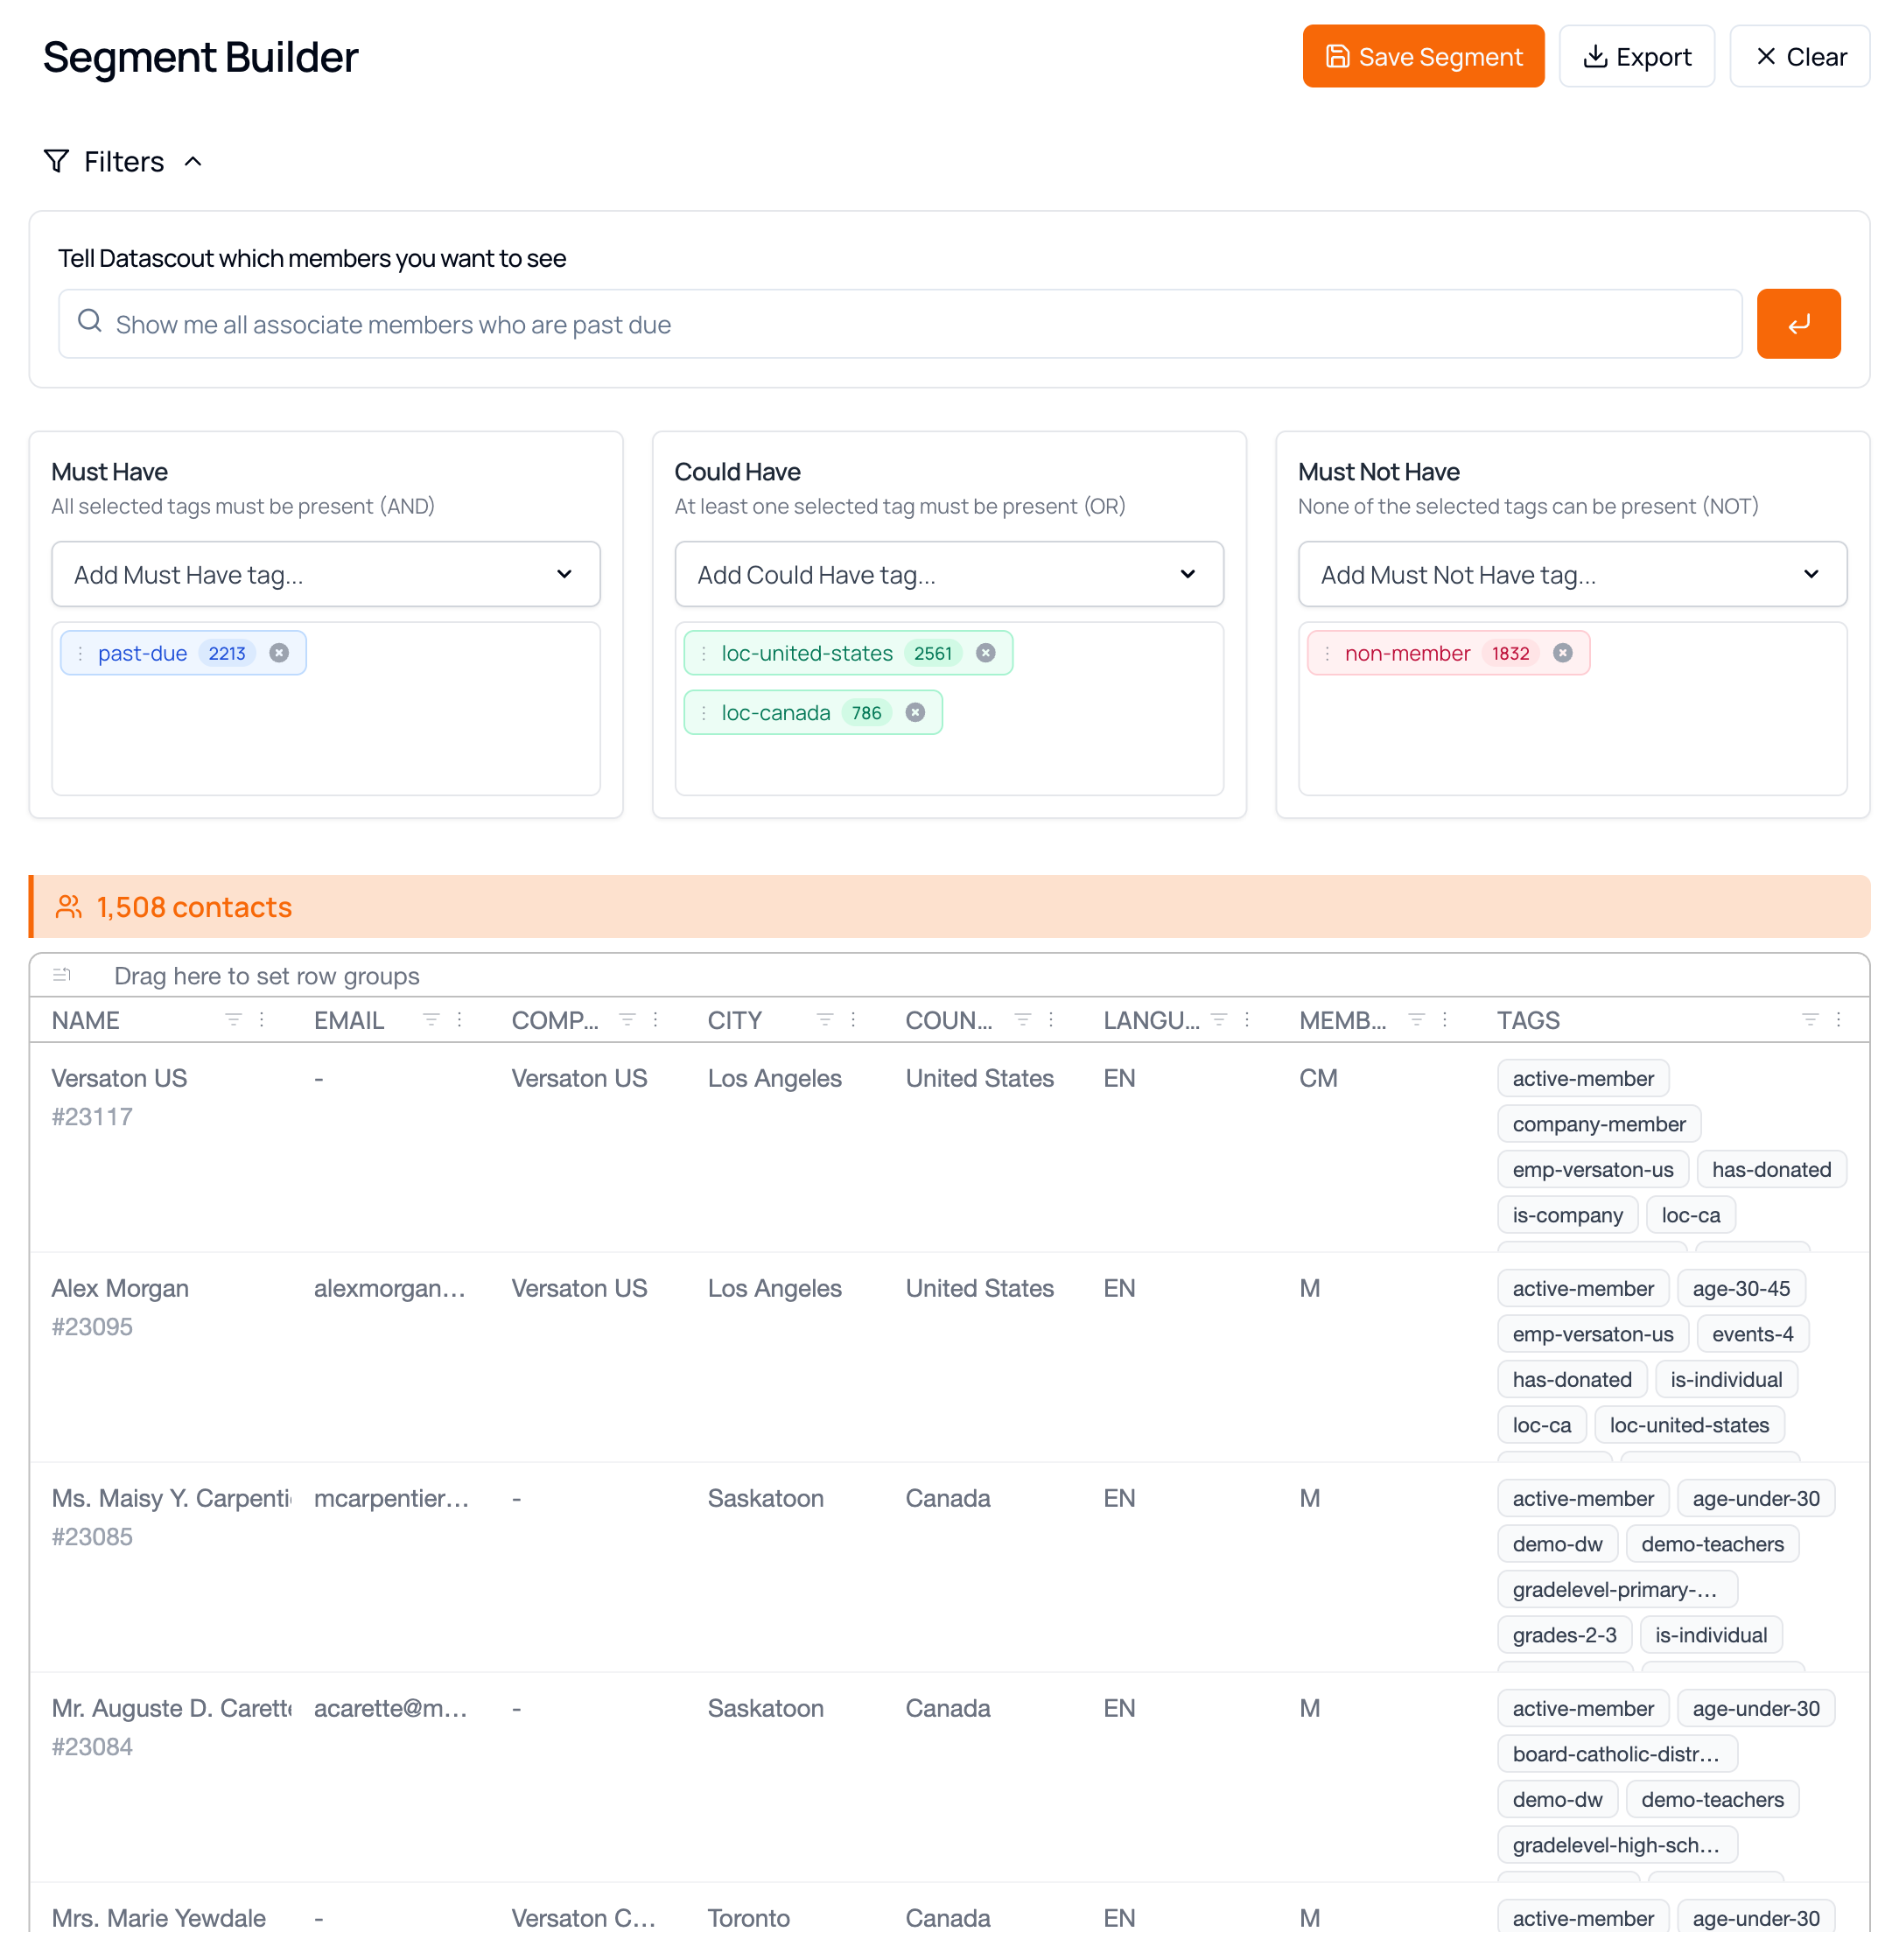
The grid beneath the count lists every matching member with these columns:
| Column | Contains |
|---|---|
| Name | Member name and their iMIS ID |
| Primary email address, or - if none is on file | |
| Company | Employer or organization |
| City / Country | Location as recorded in iMIS |
| Language | Preferred correspondence language |
| Member Type | The member-type code from your iMIS configuration |
| Tags | Every tag on that member — draggable into the filter boxes |
Each column header carries a filter icon and a menu for adjusting how the grid is displayed. There is also a Drag here to set row groups bar above the grid for grouping results — by Country or Member Type, for instance.
Saving a Segment
Section titled “Saving a Segment”Give it a name, an icon and a home in the sidebar.
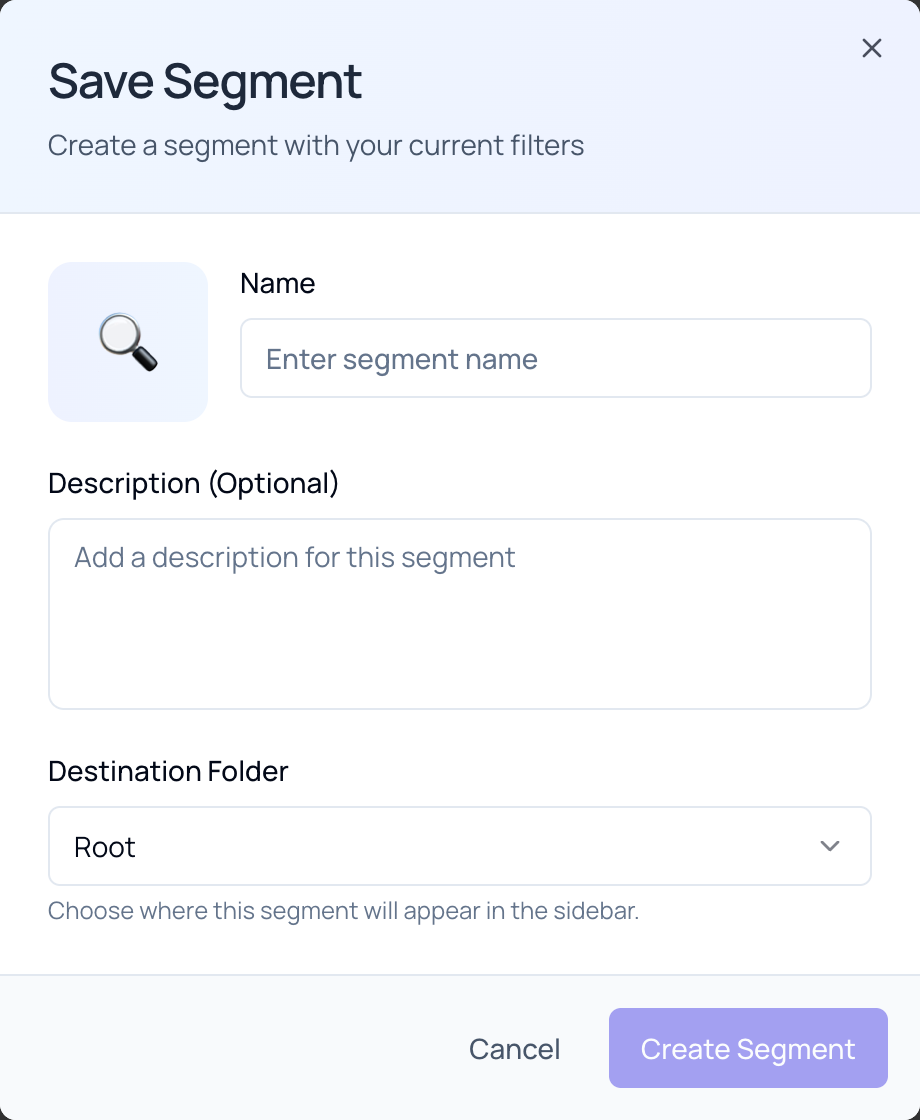
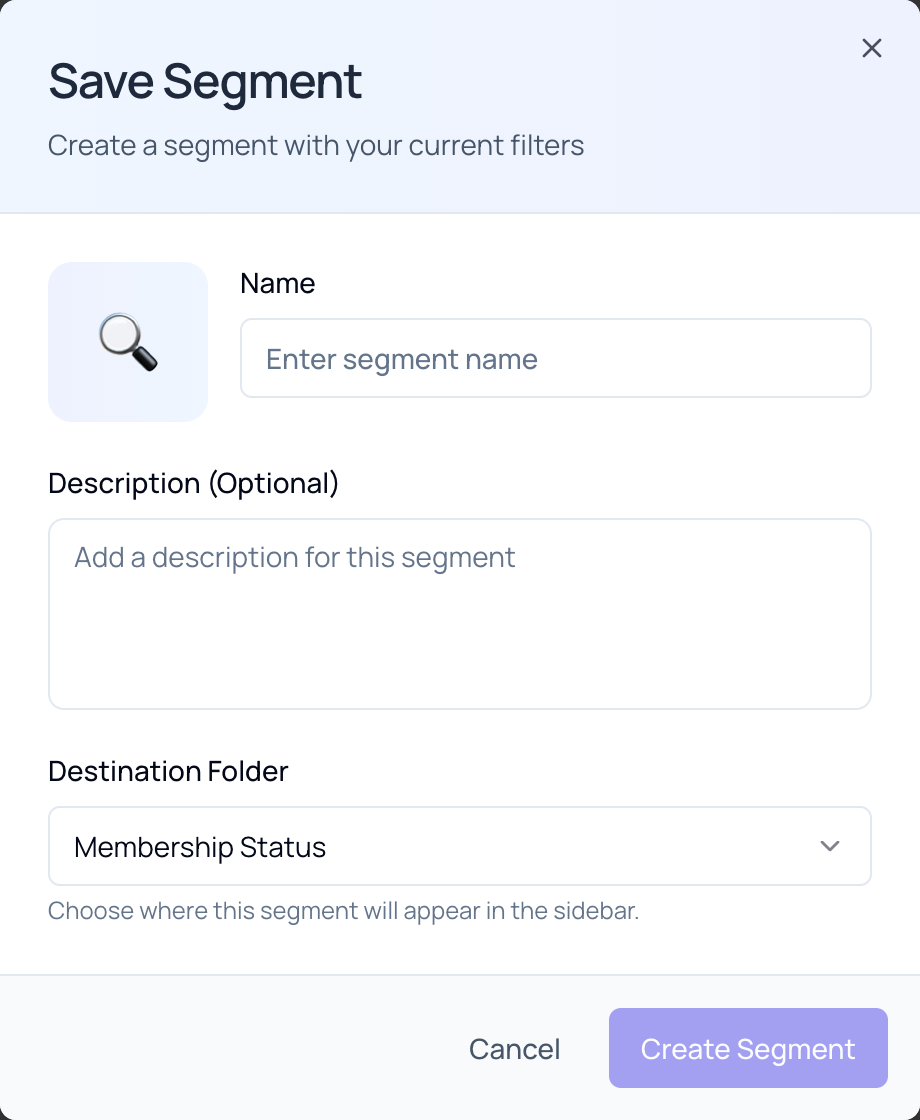
- With at least one tag applied, click Save Segment in the top-right corner.
- Optionally click the emoji tile to pick an icon — it appears beside the segment name everywhere in Engage.
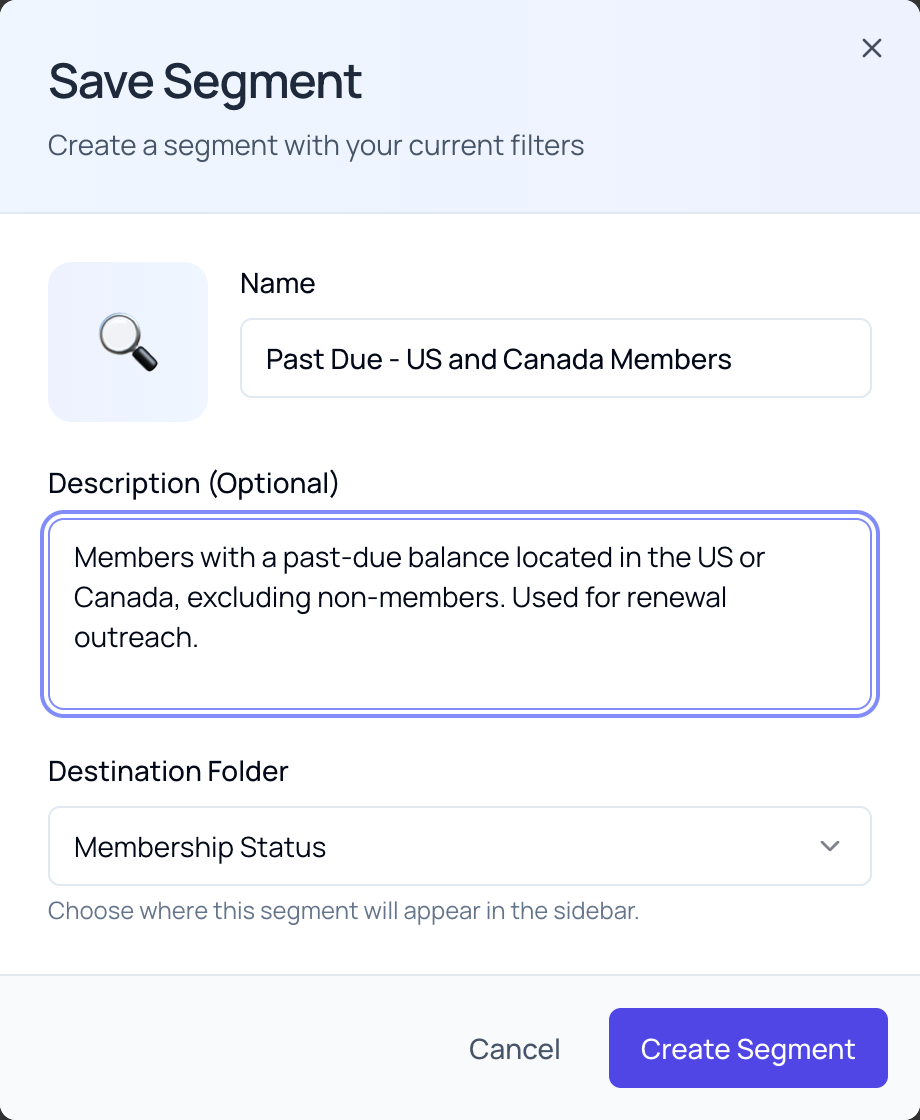
- Enter a Name. This is required; Create Segment stays disabled until you type one.
- Optionally add a Description explaining what the segment is for.
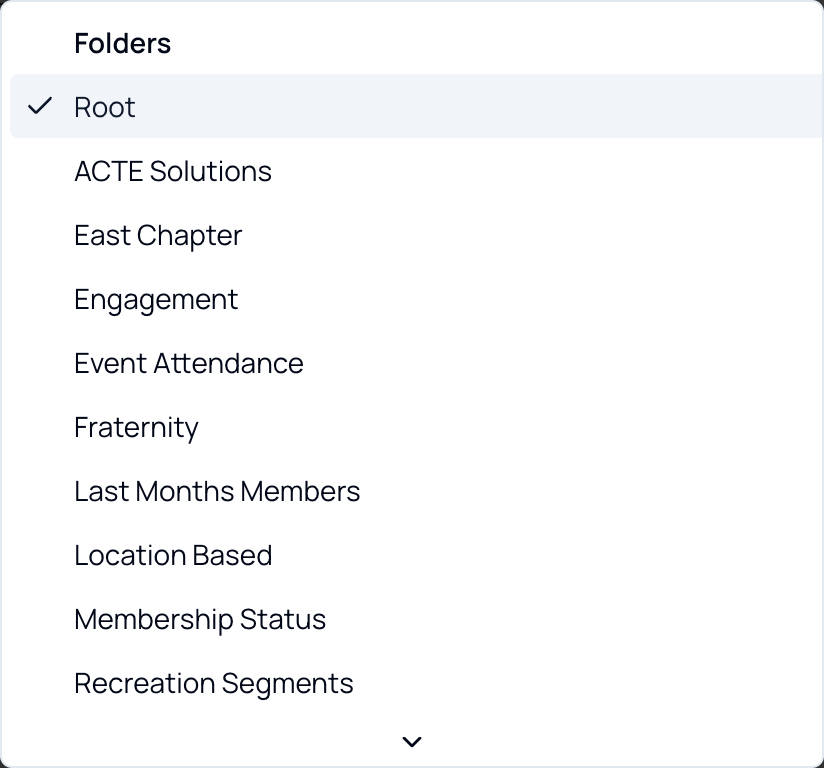
- Choose a Destination Folder. Leave it as Root to place the segment at the top level of the sidebar.
- Click Create Segment. Engage saves it and opens the new segment’s own page.
Managing a Saved Segment
Section titled “Managing a Saved Segment”Open any segment from the sidebar to rename, edit, duplicate, export or delete it.
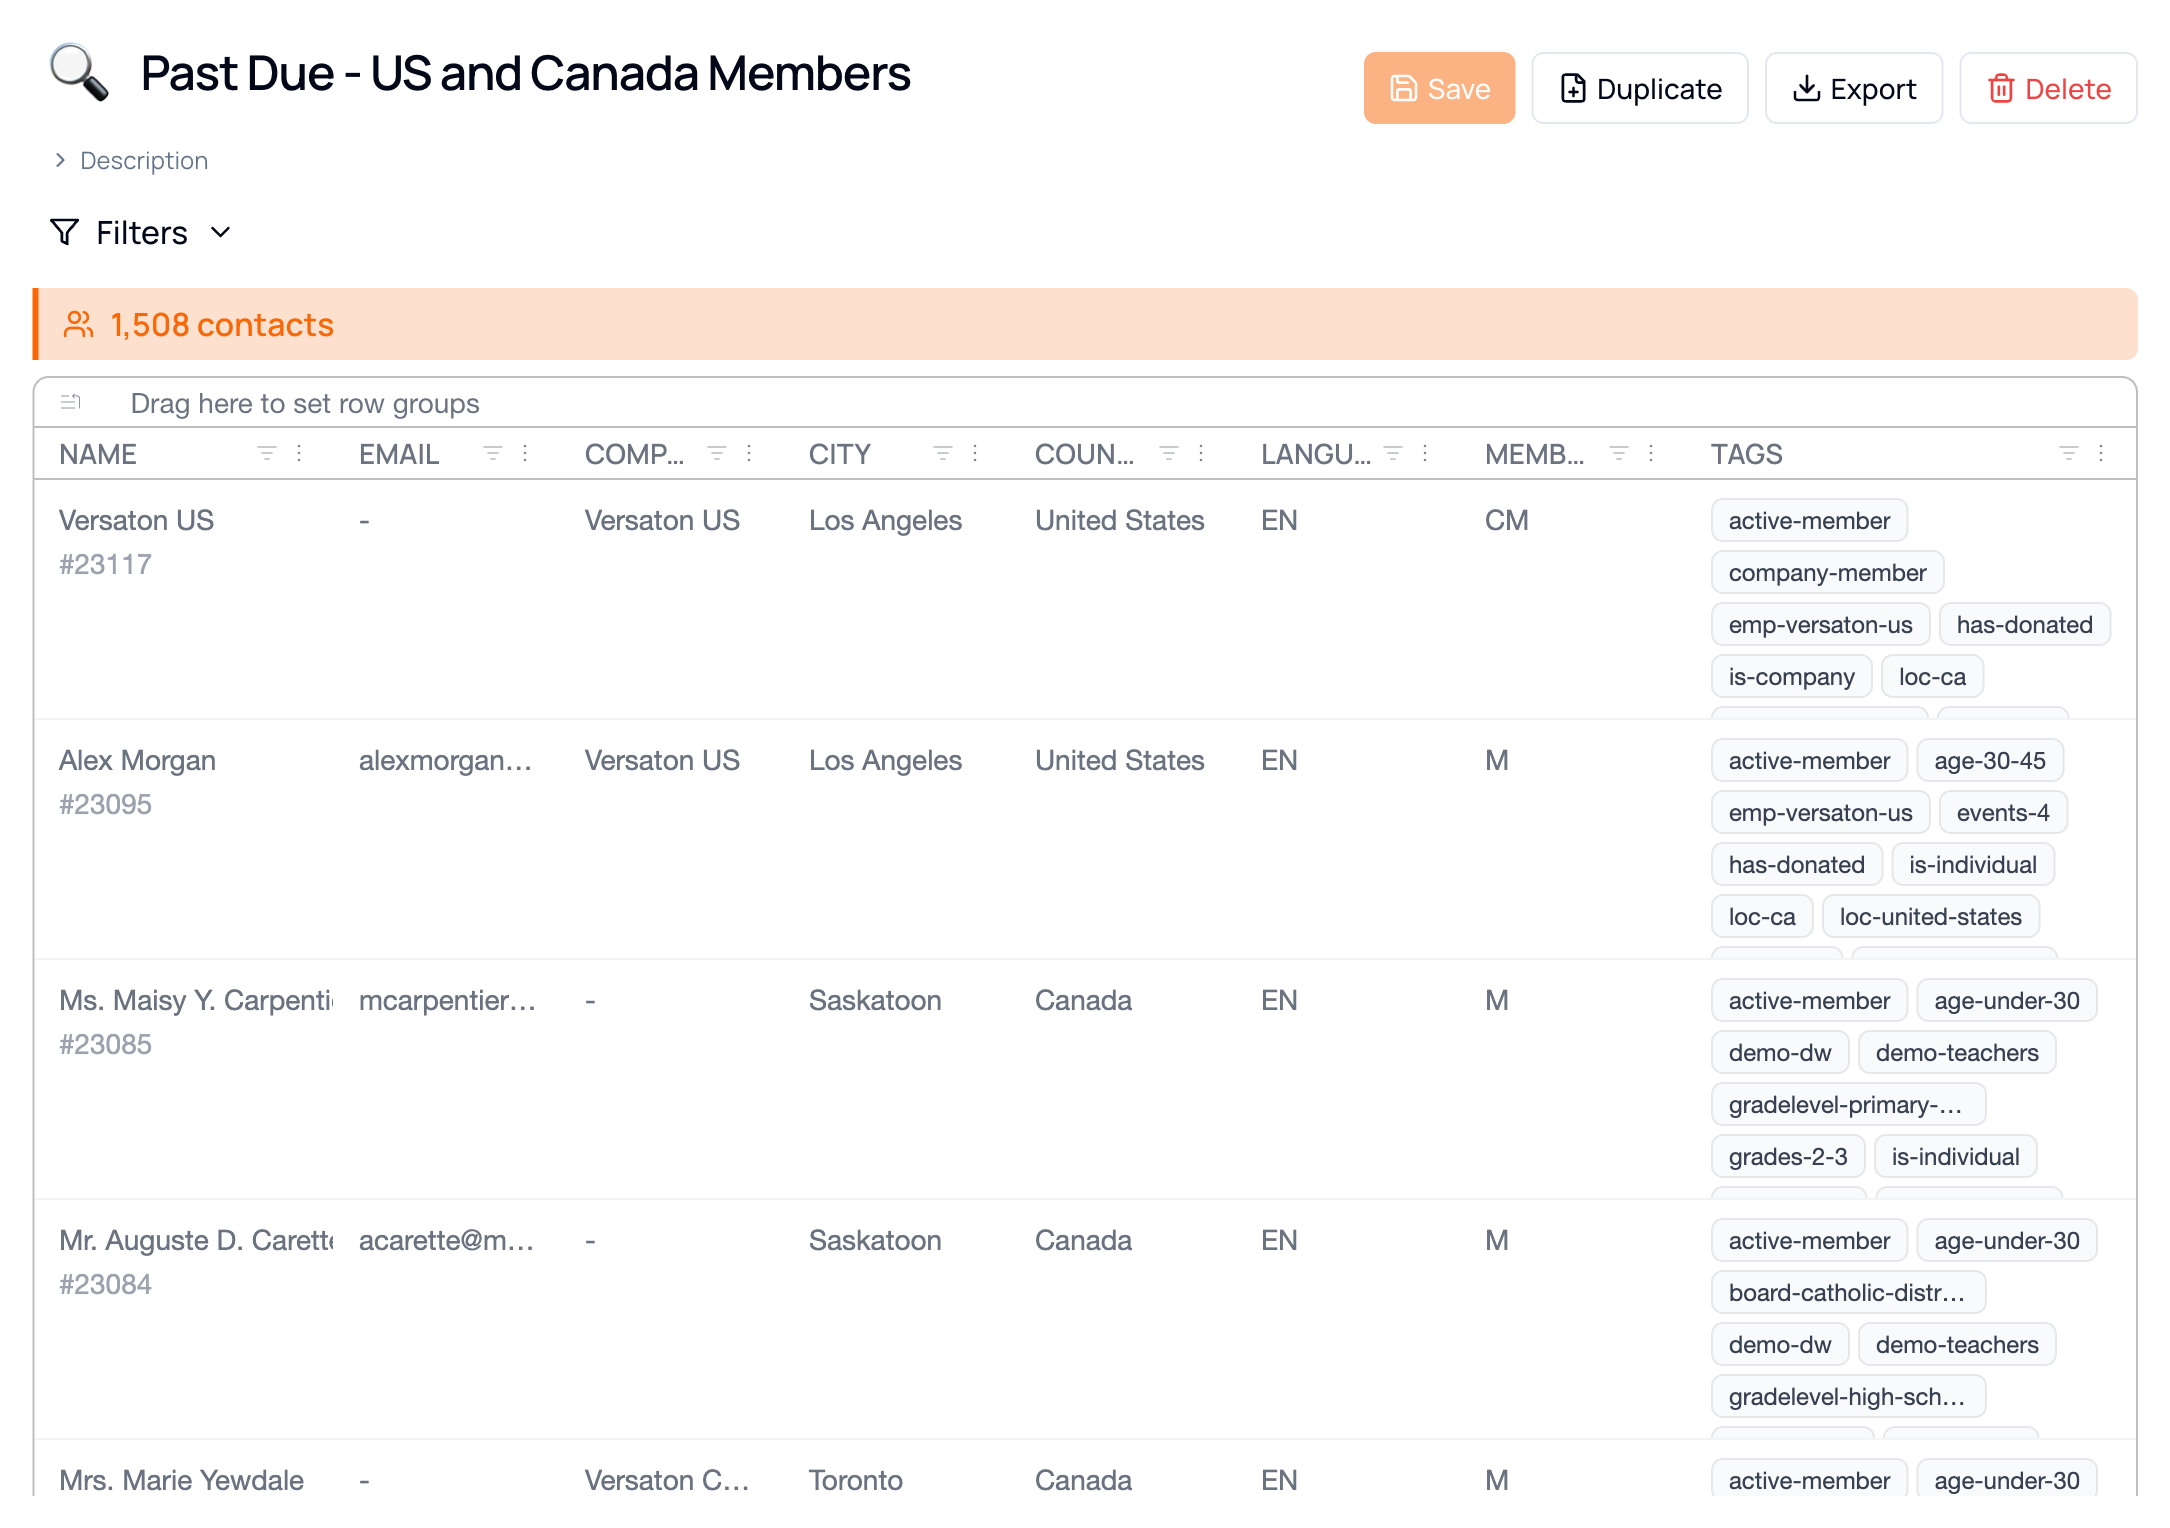

Rename It
Section titled “Rename It”Click the segment title. It becomes an editable field in place — type the new name and click outside the field to save. Press Esc to cancel without changing anything.

Read or Edit the Description
Section titled “Read or Edit the Description”Click the small Description toggle under the title to expand it.

Change the Filters
Section titled “Change the Filters”- Click Filters to expand the filter panel.
- Add or remove tags exactly as you did when building — the three boxes behave identically here.
- Click Save in the toolbar to keep the change. It becomes active as soon as something differs from the saved version.
Duplicate It
Section titled “Duplicate It”Click Duplicate to open the Save Segment dialog again with the same filters. The name field starts empty, so give the copy its own name before clicking Create Segment. This is the safest way to try a variation without touching the original.
Export It
Section titled “Export It”Click Export to download the segment as an Excel workbook. The file is named ds-<Segment-Name>-<YYYY-MM-DD>.xlsx. Export is also available from the unsaved builder, so you can pull a one-off list without saving a segment first.
Delete It
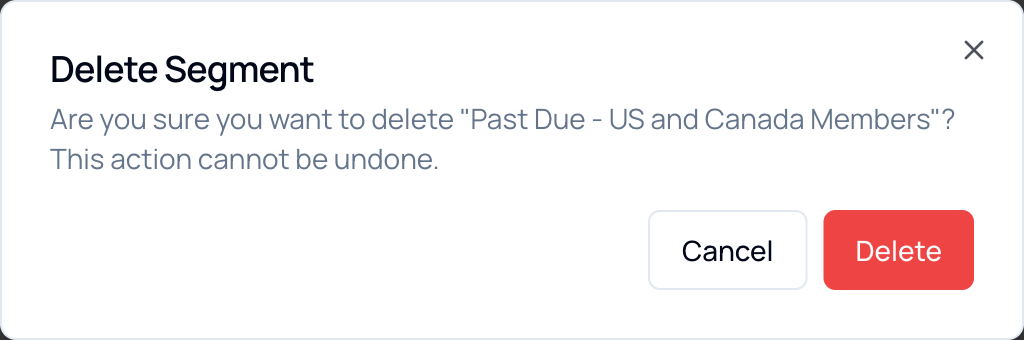
Section titled “Delete It”Click Delete, then confirm in the dialog. Engage returns you to All Members and the segment disappears from the sidebar.
Folders and Organization
Section titled “Folders and Organization”Saved segments live under Custom Segments in the sidebar, grouped into folders.
Each entry shows its emoji, its name, and its current member count, so you can see at a glance how large a group is without opening it. Choose a folder when you save a segment, or leave it at Root to keep it at the top level.
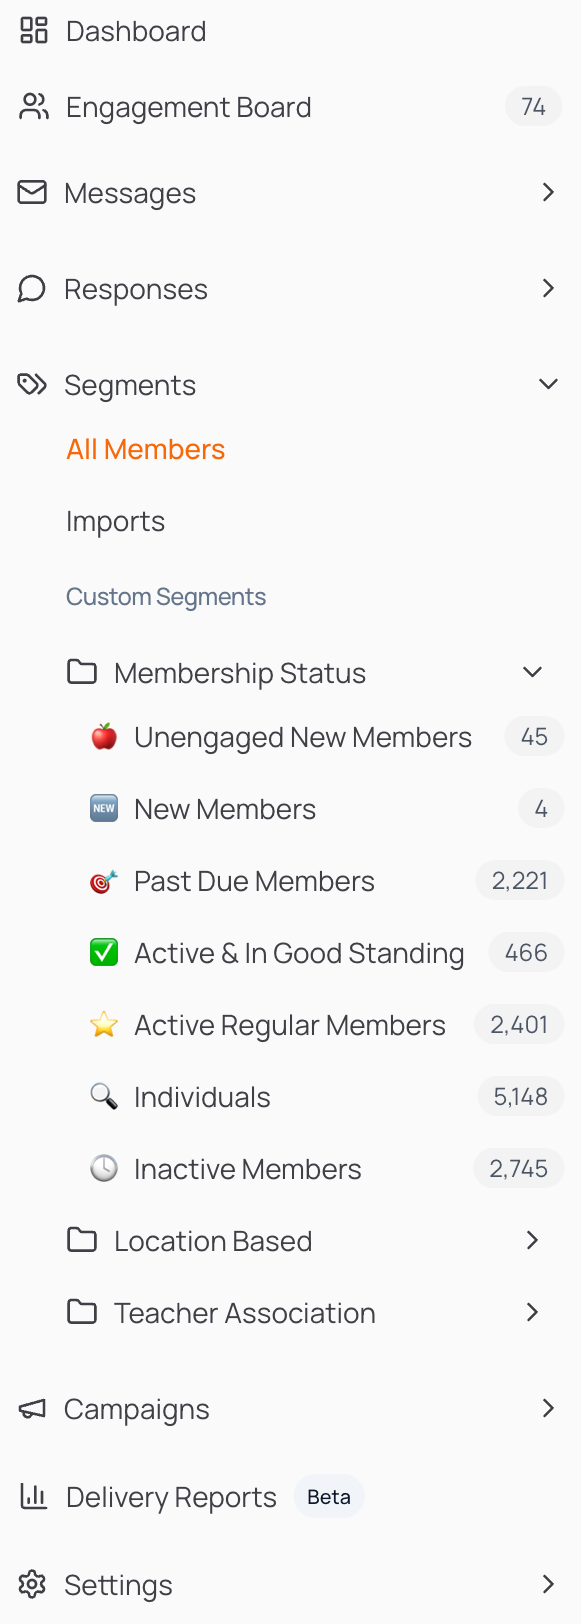
Folders are ordinary groupings — by membership status, location, event attendance, and so on. Folder management is split across two menus. The ··· beside the Custom Segments heading creates a new top-level folder, and nothing else. Each folder carries its own ···, revealed by hovering over the folder row, offering New Sub-folder and Delete Folder.
Folders nest up to three levels — Events › 2026 › Gala — and the list shows a segment’s full path, so you can see where something sits without opening every folder above it. A long name is shortened on screen and shown in full when you hover it.
Deleting a folder does not delete what is in it. Its segments and any sub-folders move up one level.
Troubleshooting
Section titled “Troubleshooting”| Symptom | Cause & fix |
|---|---|
| A plain-English request produced the wrong tags | Datascout gives you a starting point, not a final answer. Move any misplaced tag to the correct box by dragging it, remove what you don’t need, and add anything missing. Short, direct wording (“past due members in Ontario”) usually reads better than a long sentence. |
| A plain-English request found no tags | The traits you described may not exist as tags in your data. Open a filter box and browse the tag list to see what is actually available, then build the segment from those. |
| Save Segment is greyed out | No tags are applied yet. Add at least one tag to any of the three boxes and the button becomes active. |
| Create Segment is greyed out | The Name field is empty. A name is required. |
| Zero or very few results | Usually two tags that rarely occur together are both in Must Have, which demands both. Move them to Could Have to mean “either”. |
| Far more results than expected | A broad tag is doing little work, or a rule you meant to exclude is in the wrong box. Check the per-tag counts against the total. |
| Filter edits keep disappearing | Changes to a saved segment are not stored until you click Save in the toolbar. |
| A segment vanished | Segments are shared organization-wide, so a colleague with the access to do so may have deleted or renamed it. Deletion cannot be undone. |
| A tag you expect is missing | Tags are drawn from your iMIS data. If it is not in the picker it has not been synced — contact Datascout rather than working around it. |
| Stale counts or an unresponsive grid | Reload the page. If it persists, clear your browser cache and cookies. |
Quick Reference
Section titled “Quick Reference”Filter Logic
Section titled “Filter Logic”| Box | Operator | Include the member when… |
|---|---|---|
| Must Have | AND | they carry every tag listed |
| Could Have | OR | they carry at least one tag listed |
| Must Not Have | NOT | they carry none of the tags listed |
Actions
Section titled “Actions”| To do this | Go here |
|---|---|
| Open the builder | Segments → All Members |
| Build it by describing it | Type a plain-English request in the ask box → Enter |
| Add a tag | Add … tag… on any filter box, then search and click |
| Add a tag by dragging | Drag a chip from the grid’s Tags column onto a box |
| Move a tag between rules | Drag its chip from one box to another |
| Remove a tag | Click the × on the chip |
| Start over | Clear in the toolbar |
| Save a new segment | Save Segment → name it → Create Segment |
| Rename a segment | Click its title, edit in place, click away (Esc cancels) |
| Edit filters | Filters → change tags → Save |
| Copy a segment | Duplicate → give it a new name |
| Download to Excel | Export |
| Delete a segment | Delete → confirm |